How to Resolve Delivery Server Down Error in QuickBooks Online

Methods to Fix Delivery Server Down Error in QuickBooks

A quick guide to solve QuickBooks delivery server down error.

QuickBooks Online users are prone to different types of errors, mostly related to invoices and sales. Most of the users have been experiencing technical issues when trying to send invoices. This error can be resolved if you follow the correct troubleshooting procedures, all of them explained elaborately in this article. Just make sure to implement each of the methods carefully to fix delivery server down error in QuickBooks.

Different methods to Resolve QuickBooks Delivery Server Down Error

The issue can be rectified by following simple troubleshooting solutions starting from the first one below. If the first one fails, then you can switch to the next solutions and so on.

Method 1: Inspect Company and customer email address

This simple method requires you to make sure that the Company  email and Customer-facing email are correct and have the correct format. The procedure for the same is:

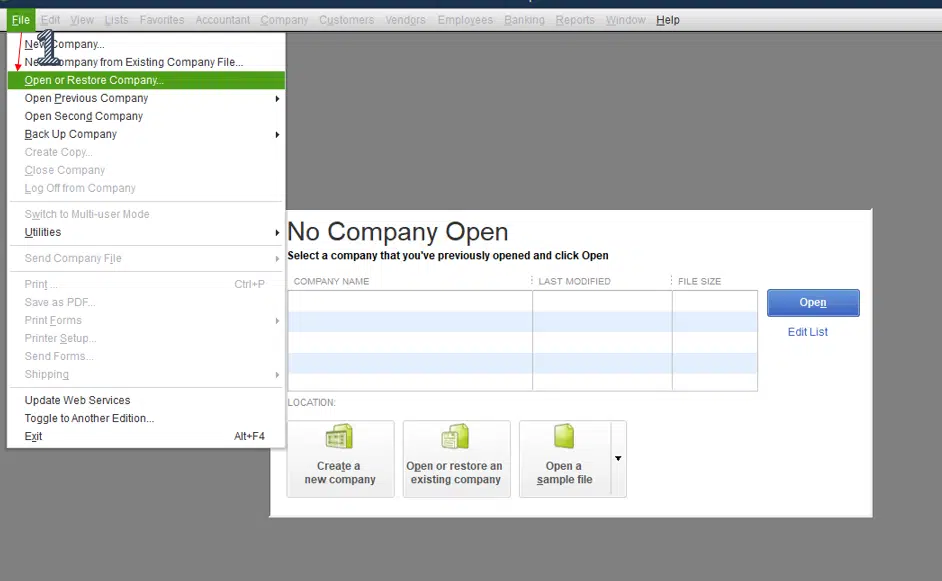
  • The first method is to head to Settings and from there you should make a move to Accounts and Settings
  • You should then go o the Company tab and from there go to Contact Info. Soon after, you should inspect Company email and the Company-facing email. For instance, the format “yourcompany@yourcompany.com” is correct while the format “email: yourcompany@yourcompany” is incorrect.

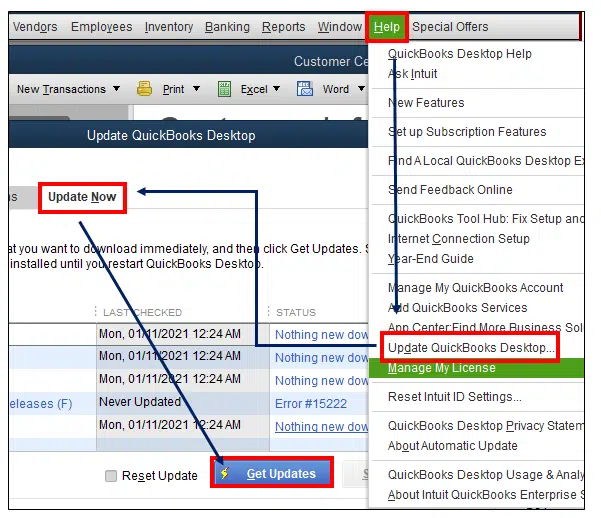
You may also read: How to Update QuickBooks Desktop To The Latest Release?

Method 2: Check the location email address

For users who are conforming to location tracker, it is important to check the correctness of the email address format employed in the sales form. The steps for implementing the same are:

  • The first action is to go for Settings and thereafter opt for All lists. After that, the selection for All lists has to be made, followed by Locations.
  • After that, in the Action column, the dropdown menu should be chosen and then the next step should be to click on Edit.
  • Email address should be checked in “This location has a different email address for communicating with customers” and the changes if any should be made.
  • Followed by this, the next step should be to click on Save and then another attempt to send the sales form should be made.

Method 3: Give a check to the Invoice format

Incorrect format of the invoice can also result in QuickBooks online delivery server down error. Especially special characters like (! @ # $ % ^ & * ( ) _ – = + : “) should be avoided in Description, Attachment name, Message, Email id and custom form templates.

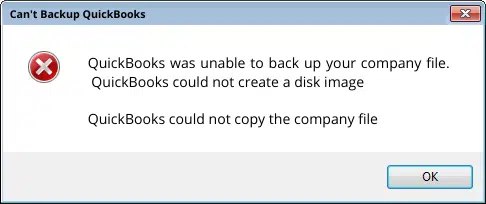
Related topic: How To Troubleshoot Backup Company File Issues In QuickBooks Desktop?

Method 4: Checking the correctness of sales forms email option

In such cases, users need to go for updation of the attachment setting when sending email sales forms. The simple procedure for the same is discussed below:

  • First, go for Settings, and this should be followed by Accounts and Settings.
  • The subsequent process is to go to Sales tab and then Online Delivery.
  • Here, the “PDF Attached” option should be chosen or cleared.
  • When the change has been made, the immediate step should be clicking on Save.
  • Now, make another attempt to send sales form.

Method 5: Examine the settings of Adobe Acrobat Reader

Within Adobe Reader, the following options need to be chosen in the printing options.

  • Corresponding to “Size”, “Actual Size” should be chosen.
Adobe-Acrobat-Settings-quickbooks-delivery-server-down
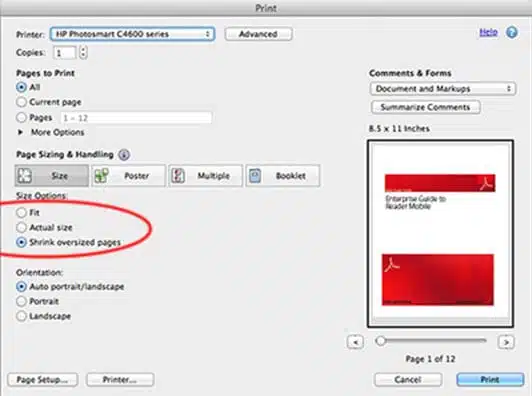
  • The orientation should be selected to “Automatic”.
  • Besides the “Choose paper source by PDF page size”, the “On” position should be selected.

Read also: Procedure To Merge List Entries In QuickBooks Desktop

Method 6: Checking browser PDF setting

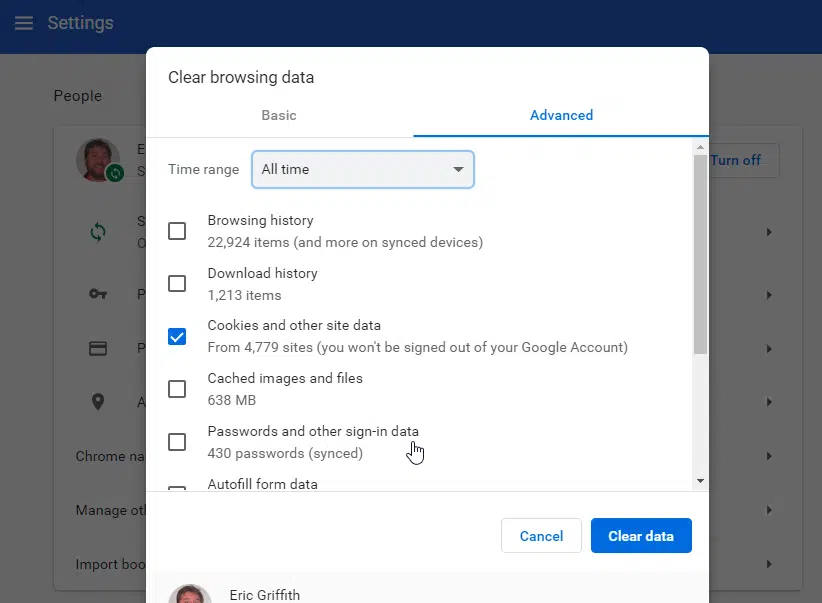
For users who are facing delivery server down error in QuickBooks and are using Google Chrome, the default PDF download permissions should be changed. The steps are:

  • Launch Google Chrome first and after that you need to click on More and then Settings.
  • This needs to be followed by Privacy and Security and then “Site Settings”.
  • The next step is choosing Additional Permissions and then Automatic Downloads.
  • The last step requires making a choice for default setting.

Method 7: Checking the Print and PDF Settings

The file being sent over email should not be sent as a ZIP file and also the file size should not exceed 25 MB. Also, while sending the email, use of special characters should be avoided.

Check also: Troubleshoot QuickBooks Online Dependent System Error

That’s it!

This discussion focused on different methods for fixing QuickBooks delivery server down error. You can always connect with our QuickBooks experts and share your queries. Our experts shall make sure the issue gets sorted out permanently. You can reach us out through chat support or else give us a direct call.

Recommended to read:

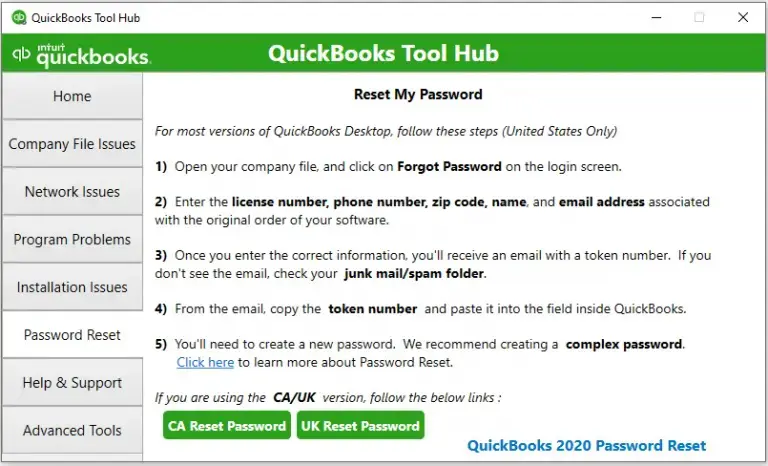
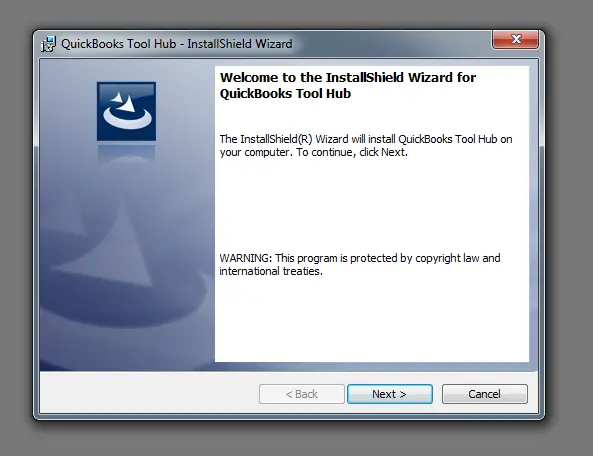
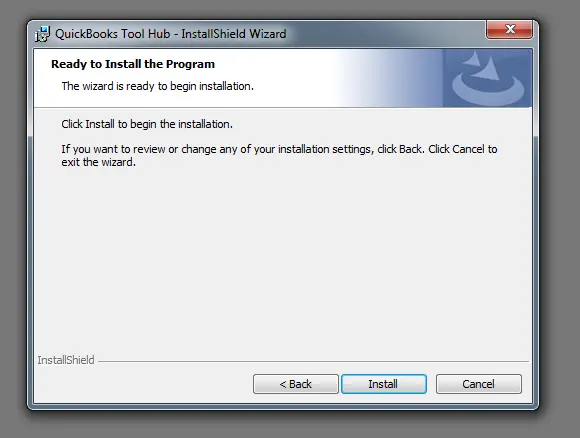
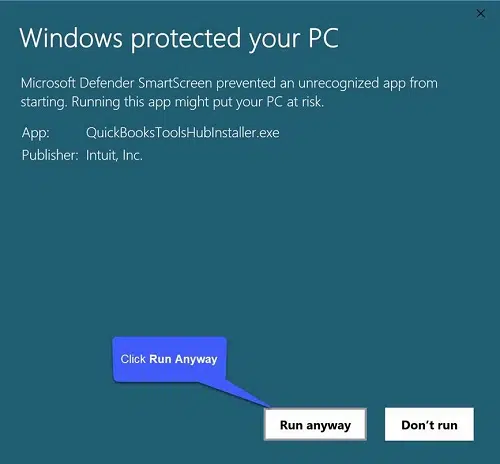
Download QuickBooks Tool Hub to Fix Error

How to Troubleshoot QuickBooks Banking Error 179?

Methods to Fix Potential Data Issues In QuickBooks Desktop

How to Fix IIF Import Error in QuickBooks Desktop

Methodologies to Resolve IIF Import Error in QuickBooks Desktop

A major chunk of QuickBooks users are facing technical errors of different types. One recent entrant in the list of errors is the IIF import error. IIF stands for Intuit Interchange Format and these QuickBooks files are relevant when you try to import or export the list of transactions. These files make the import and export of transactions much easier. In this context, IIF Import kit helps to make the process of import and export way more seamless. Many users have faced IIF Import Error in QuickBooks Desktop.

This article shall prove to be a respite for users who are facing the issue. Read the walkthrough all to the end to fix IIF Import error in QuickBooks Desktop.

File-Not-Imported-Error-Image

What is the Intuit Interchange Formal (IIF) Import kit?

For importing bulk data, Intuit Interchange Format (IIF) Import kit can be used as an effective tool. This tool can be downloaded and installed from Intuit. As a test, you can try to import a sample file to import QuickBooks Transactions. IIF Kit comes with IIF Import Manual, IIF Example files, IIF Header help.

  • IIF Import Manual elucidates .iif issues and the variegated rectification steps.
  • IIF Example Files come in the form of the folder containing certain .iif transaction samples.
  • In the IIF Header Help, column headings are employed to import list data to QB Desktop.

You may also read: Troubleshoot QuickBooks Online Dependent System Error

Procedure for downloading and Installing IIF Import Kit

Walkthrough for the downloading and Installing the Intuit Interchange Format is discussed in a lucid way below for your easy understanding.

  • At the initiation, you should go to Intuit website and from there, IIF Import kit can be easily downloaded and installed.
  • When the downloading is done, you can use some extractor tool like the Winzip extractor for the extraction process. Extract all the downloaded contents to a separate folder to avoid confusion and then install the same.
  • You can then, access folder containing the IIF Import kit and from there different contents like the IIF import manual, IIF Example Files and IIF Header Help can be found.

Lists that can be Imported to QuickBooks Desktop

The lists that can be imported to QuickBooks are encapsulated in the following table:

Vendor typesItems  Import Chart of Accounts  
Employees Classes  Sales tax codes Price level    Payment terms  
Customers and Customer: jobs  Customer messages  Customer and job types  
Budgets  QuickBooks Import Inventory  Import Sales Receipt  
Import Invoices into QuickBooks  Shipping methods   

You may also know: Update Your QuickBooks Desktop To The Latest Release

Walkthrough for Troubleshooting IIF Import Error in QuickBooks Desktop

IIF Import Error in QuickBooks has been reported by many users in recent time. This error can be quite easily fixed by sticking to the following set of steps:

  • The first step requires launching QuickBooks as admin and following that, making a switch to the Single user mode.
  • This should follow with a click on the File tab from where the Utilities option needs to be chosen.
Naviagate-Utilities-Option-Screenshot
  • This should follow with a click on the Import option and then you can click on Import IIF files.
Import-option-in-QuickBooks-Screenshot-Image
  • This requires clicking on Browse, then choosing the file for Importing.
  • When the correct file has been successfully chosen, you subsequently require making a choice for the option “Import it for me. I’ll fix it later”.
Import-IIF-file-Image
  • When that choice is made, click on Ok.

Process to Import Transactions in QuickBooks Desktop

Importing of transactions in QB Desktop involves no complicacy, but is rather a very easy process. The steps to get your transactions imported to QuickBooks Desktop are:

  • The Company file needs to be first signed with Administrator account and when QuickBooks is already running, go for the File menu, and after that go for switching to Single-User Mode option.
Switch-company-file-to-single-user-mode-Screenshot
  • Now, the backup of the Company file needs to be taken.
  • When the backup is successfully created, this should immediately follow with the File tab, and then Utilities, & finally the Import option.
  • You can now click on the option to “Import IIF Files”, and then choose the IIF file to import.
Import-IIF-fileImage
  • The final step is to start the Import process.

Also check: QuickBooks Tool Hub – Download, Install And Use It To Fix Errors

Conclusion!

The main objective of this article is to apprise readers of Intuit Interchange Formal (IIF) Import kit and also to get rid of IIF Import Error in QuickBooks Desktop which has been encountered by many users in recent times.

Recommended to read:

How to Fix QuickBooks Error 179?

Learn to Fix Potential Data Issues In QuickBooks Desktop

How to Resolve QuickBooks Error 15276?

How to Update QuickBooks desktop to the Latest version

Different Methods to Update Your QuickBooks Desktop to the Latest Release

Learn the Easy ways to Update your QuickBooks Desktop to the latest version.

QuickBooks has no doubt gained suzerainty in the accounting sector through remarkable features. This remarkable program has come as a great respite for business owners from every perspective. This accounting tool is quite expansive and Intuit, its founder, keeps updating new features and fixes every now and then. This article explains all the possible ways to update QuickBooks desktop using simple procedures all using your fingertips.

Why update QuickBooks Desktop?

Now, the question arises about the necessity of updating QuickBooks Desktop and its perks. Well, updating QuickBooks can offer astonishing add-ons to your QuickBooks Desktop copy. These encompass:

  • Enhanced security.
  • Fixes for glitches existing in the previous versions.
  • Specific features like real time invoice sharing, file security, and ancillary features to enhance user friendliness.
  • Other improvements in the company file data sharing, enhanced privacy, security against data loss, improved troubleshooting, etc.

You may also read: Backup Company File Issues In QuickBooks Desktop

Recent QuickBooks Desktop Update releases

The updates rolled out in recent time include:

  • QuickBooks 2024 R1
  • QuickBooks 2023 R6_25
  • QuickBooks 2023 R3_103
  • QuickBooks 2022 R11_51
  • QuickBooks 2022 R5_157
  • QuickBooks 2021 R15_17
  • QuickBooks 2021 R10_52
  • QuickBooks 2020 R15_52

Quick Procedure to check the QuickBooks Desktop version

The users should first give check on whether they have an old version of QuickBooks Desktop or the latest version of the software is already installed on their system. This can be easily checked by doing the following:

  • Run QuickBooks using the administrator privileges by a right-click on its Desktop icon, and then clicking on Run as Admin
  • When QuickBooks opens, the immediate next step should be to press F2 key on the keyboard. This action directly opens the Product Information Window. Here, all the details related to the product can be checked. Also, the version of QuickBooks Desktop currently set up on the system is also indicated clearly in this window.
Check-the-current-version-and-release-Image
  • If the version if not the latest one, then definitely QuickBooks requires an update.

Similar topic: Procedure To Merge List Entries In QuickBooks Desktop

Procedure to Update QuickBooks Desktop 

There are two easy approaches that can be resorted for updating QuickBooks Desktop. These are:

  • Automatic Updates
  • Manual Update

Automatic Updates

The best approach to update is to give QuickBooks to give QuickBooks the prerogative to automatically update the program. The steps are:

  • The first process involves running QuickBooks and this should immediately be followed by a click on the Help tab.
  • Soon after, the option “Update QuickBooks” should be chosen.
Updating-QuickBooks-Image.png
  • Afterwards, the option to click on Update Now could be chosen and the Reset update option marked.
  • Here, you need to checkmark the option to enable Automatic Update by clicking on “Yes” on the option besides it.
  • Once that has been ensured, the next step is to click on Save and Close.
  • You can click on Get Updates to download the updates instantly, or else you can close the program and allow it to download and install the updates automatically.

Manual Updates

Many a times, the Automatic method to update QuickBooks Desktop can face up different issues and the user may face innumerable challenges to get the program updated to its recent release. The issues may pop up in the form of error codes or sudden crashing or freeing of QuickBooks or the system in itself. This issue can easily be bypassed and QuickBooks can be updated by using the manual method. This involves the following set of steps:

  • The first requirement is that the internet connection has to be uninterrupted and then you need to open the web browser. Open any random website to check the internet connection. If its showing issues, then you can restart your router and try connecting again.
  • Then, go for the Intuit website and opt for the Download tab, wherein you should easily find the option to manually download the QuickBooks Desktop update file.
  • Get the file downloaded on your system and this should immediately be followed with its installation by double-clicking on the downloaded file in the Downloads folder.
  • Wait until the process is complete. You can subsequently run QuickBooks Desktop and press F2 key.
  • The latest version should be showing up as the current version.
  • The process can be repeated at the time of the next update rolled out by Intuit, or else you can right away choose the Automatic Update option to give QuickBooks program an open hand to install the latest updates whenever they are available.

Check also: Fix Missing Employee In QuickBooks Desktop Payroll

Walkthrough for Updating QuickBooks Desktop for MAC

QuickBooks Desktop for Mac users have a different set of procedures and guidelines that they need to follow while updating QuickBooks Desktop. These are elaborated in the following lines:

Step 1: At the start, give a check on the existing QuickBooks version

  • The first step is to run QuickBooks Desktop for Mac. This needs to be followed by a click on Command + 1 key on the keyboard.
  • This action shall show the current version of the QuickBooks Desktop on the system.

Step 2: Update QuickBooks for Mac using the In-Product Update

Here are some points to remember to Update QuickBooks for Mac.

  • The first viable approach of updating QB for Mac users is by clicking on the drop down, which should be followed by a click on Check for QuickBooks Updates
  • The next process is to tap on the option “Install and update”.
  • The update will start setting up soon after.

Read also: How to Resolve QuickBooks Error 15276?

Step 3: Manual Method to Update QuickBooks Desktop for Mac

One more method for users who are facing issues during the In-Product update is acquiring the updates manually. The process is simple and the user should uninstall the older update and set up the latest ones.

  • Now, visit the browser and navigate to the Intuit website. from here, the next move involves going for the QuickBooks Product Updates section corresponding to QuickBooks Desktop for MAC.
  • This should be followed by a click on .dmg file and the same file should be dragged into the Application folder for installation of the update.

Newest updates for QuickBooks Desktop for MAC

The latest updates rolled out by Intuit for QuickBooks for MAC include:

  • QuickBooks Mac Plus 2024 R3
  • QuickBooks Mac Plus 2023 R6
  • QuickBooks Mac Plus 2023 R5
  • QuickBooks Mac Plus 2022 R10
  • QuickBooks Mac 2021 R13
  • QuickBooks Mac 2020 R14
  • QuickBooks Mac 2020 R17

Recommended to read: Troubleshoot QuickBooks Online Dependent System Error

This ends the discussion which uncovered the multiple methods to update QuickBooks Desktop using the Automatic method and the Manual method. Any unresolved queries can be shared with our QuickBooks experts, who shall address each and every query reported from your end. Queries can be raised through the Chat support  or through the helpline number.

How to Fix Company Files Issues in QuickBooks Desktop

How to Troubleshoot Backup Company File issues in QuickBooks Desktop?

Company files are the focal point of all the accounting operations in QuickBooks and their backup is extremely crucial. There is no doubt in the fact that Company file are secure but these files should be backup up time and again to secure them against data damage. While this is a prerequisite, many users in recent times have experienced backup company file issues in QuickBooks desktop. If you are also facing the same issue, the information contained in this article is going to get all your doubts cleared.

QuickBooks-Unable-To-Backup-Company-File

Brief explanation of QuickBooks unable to backup company file error

QuickBooks company file backup error is encountered when you make an attempt to create a backup of the company file. The error most of the times appears as “QuickBooks was unable to back up your company file”. QuickBooks could not create a disk image. QuickBooks could not copy the company file.” There are other manifestations of this error too, just like “Backup failed” or “QuickBooks unable to backup company file”. Other forms include:

  • QuickBooks error code 6189, 82
  • QuickBooks Unrecoverable error
  • QuickBooks Error 6000 series
  • QuickBooks Error code C=272, Error code C=343 and other errors belonging to the C series.
  • QuickBooks error code 3371
  • QB Error 6190, 816, etc.

You may also read: Merge List Entries In QuickBooks Desktop

Major causes of Company file backup issues in QuickBooks Desktop

Backup errors are not uncommon and in fact many users have been facing this error in one way or the other. The primary causes of this error are:

  • Company file being damaged is generally the most common cause of this error
  • The destination path of the backup is wrong, corrupted, or does not exist.
  • The size of the company file is exceeding 3 GB
  • The name of the company file is having characters exceeding 65
  • You may be trying to save the back up of the company file in some external hard drive.

You may also check: Fix Missing Employee In QuickBooks Desktop Payroll

Multiple solutions to fix backup company file issues in QuickBooks Desktop

This issue observed while backing the company file can be dealt by following some basic instructions discussed below under troubleshooting solutions.

Troubleshooting Solution 1: Choosing New Company file Name

  • The procedure should begin with the opening of QuickBooks as an admin. This can be simply done by right-clicking on the QuickBooks executable file on the Desktop and choosing Run as Administrator option.
Run-as-Administrator-Image.png
  • As the accounting program gets loaded, the next move involves the selection of the File menu, and then the option to Open or Restore Company.
Open-or-Restore-a-company-file-Image.png
  • Here, you should click on the option to Open a Company file, and after that, go with the tab titled Next.
  • Final step requires clicking on New Company File Name tab and finally hitting on Open.
  • Now, you can try to backup the file in the .qbb extension to a suitable folder. The process should not show up Company file backup issues now.

Troubleshooting Solution 2: Checking the Company file and file name size

As already listed in the “list of causes” section, when a user tries to backup a company file with a file name exceeding 65 characters, or the Company file size going beyond 3 GB, then the backup process of such files can be fraught with different company file backup issues. So, you should limit the company file name to 65 characters, and if the file size exceeds 3GB, then, in that case, you can use the QuickBooks condense data tool to compress the company file.

Related topic: Fixing Potential Data Issues In QuickBooks Desktop

Troubleshooting Solution 3: Renaming the Company file

The problem can also be fixed by renaming the Company file. For this, you need to first visit the Company file folder, which, in most cases is in the Intuit folder in the C drive (Default installation directory of QuickBooks). But if you are unable to locate the Company file location, you can run QuickBooks, open the company file, and then press F2 key. This should help you with the location of the Company file folder. Upon reaching to the Company file folder, the ext set of steps are:

  • At first, you need to look for the same company file which you are trying to backup.
  • When the file is identified, right-click it and click on the Rename option.
  • Change the name of the company file and when that is done successfully, you can run QuickBooks once again and open the same Company file with a changed file name.
  • If the issue is still occurring, it is advised that you change the Company file name to the original one, and after that, try the Verify and Rebuild data tool (explained in the next Solution).

Troubleshooting Section 4: Using Verify and Rebuild data tool

It is always recommended to resort to the inbuilt data tools of QuickBooks before conforming to external means of error resolution. One such inbuilt tool to fix Company file problems in QuickBooks Desktop is the Verify and Rebuild Tool. This all in one tool can help in resolving Company file backup issues in QuickBooks Desktop. The easy steps to use the tool are explained below:

  • At the start, you simply need to run QuickBooks and then go for the File menu.
  • This option unveils different option from where you need to click on Utilities. A click on utilities option opens a set of options, including “rebuild data” option and “verify data” option.
Utilities-Verifying-the-Data-or-Rebuild-Data-Screenshot.png
  • You should first click on Rebuild data option. The tool will first prompt you to go for a Company file backup. When that is done, the next step is simply to start the Rebuilding process.
  • As the process is completed, any positive changes can be verified by using the Verify data tool. Simply go for File, then Utilities, and then the Verify data option.
  • The tool should not show any data integrity issues related to the Company file. If it does, then you should try the rebuild option again.
  • Following this procedure, you should again try to backup the Company file.

Similar blog: How to Troubleshoot QuickBooks Banking Error 179?

Conclusion!

With that we reach the concluding paragraph of this article, which covered different troubleshooting solutions to fix Company file issues in QuickBooks Desktop. This error may seem challenging to troubleshoot, but following the walkthrough elaborated in this article should help you effectively rectify it permanently. If you have any unaddressed queries, you should get in contact with our QuickBooks experts through the Chat support available on our website, or by calling us on our helpline.

How to Merge List Entries in QuickBooks Desktop

Learn the Procedure to Merge list Entries in QuickBooks Desktop

A Quick Guide to merge list entries in QuickBooks desktop

Many QuickBooks users are seeking walkthrough to merge accounts, customers, vendors, and entries in QuickBooks Desktop for Windows and Mac. This blog shall elaborately discuss in detail the procedure to merge list entries in QuickBooks Desktop.  One needs to keep in mind that the same item can be made twice with different names, and later these items can be merged to ensure the accuracy in lists. Keep reading this article completely to get fully aware of the procedure to merge list entries in QuickBooks Desktop.

Necessary Prerequisites before you merge list entries in QuickBooks Desktop

There are some important pointers you need to take care of before you merge list entries in QuickBooks Desktop. These include:

  • QuickBooks Desktop for Windows or Mac should be updated.
  • The company files should be saved in their original Company folder.
  • QuickBooks needs to be switched to the Single User mode and the company file should then be accessed.
  • Any remaining accountant changes should be cleared.

You may also read: How to Fix QuickBooks Error Code 179?

Instances when List entries wont merge in QuickBooks Desktop

There are certain instances when list entries can’t be merged. These include:

  • Multicurrency being turned off in QuickBooks Desktop Windows.
  • The vendors being arranged are not Tax authorities, Tax exempt, Paid through online banking or Direct deposit vendors.

Procedure to Merge list entries in QuickBooks Desktop for Windows

The procedure for QuickBooks Desktop for Windows is explained as under:

  • Open QuickBooks and head for Lists. This should then be followed by selection of the list to be merged.
  • The names of the entries to be merged should then be copied.
  • This should follow up with a right-click on the entry that is not to be used by you and his should then be followed by a click on Edit.
  • The copied name should then be pasted and after that, go for the Save and Close tab.
  • This should be followed by a click on Yes for merging the entries.
  • Just in case you encounter the error message stating “You cannot merge an account that has online information associated with it into another account”, this is an indication that there already exists an  active bank feed on one the accounts. This should be deactivated.

Related topic: How to Fix Potential Data Issues In QuickBooks Desktop

Using Merge Vendors tool in Accountant and Enterprise editions

  • For Accountant Edition users: Such users are required to head to Accountant, and from there go for the selection of the Client Data Review, and then the Merge Vendors option.
  • Enterprise edition: Head for the Company option and this should soon after be followed by making a choice for Accounting tools and the Merge Vendors option.
  • The vendors to be merged should then be chosen and then the user should click on Next.
  • This should be followed by a selection of the Primary Vendor, followed by clicking on Merge.
  • One needs to then click on Yes for completing the merging process and then hitting on Ok.

Merging list entries in QuickBooks Desktop for Mac

QuickBooks Desktop for Mac users need to follow the below mentioned procedure to merge list entries in QuickBooks

Merge entries in chart of accounts, Item, Customer: Job, Vendor, Employee, and Other Name

Re-name to merge:

  • First of all, head for Lists, and from there make a choice for list with entries to merge.
  • This should be followed by copying the entry name. Also, make a choice for the entry that is not to be used. This should follow with a click on the pencil icon indicating the edit option.
  • The copied name should be pasted and this needs to follow up by a click on Ok.
  • Click on Yes and this shall merge the entries.

Using the Merge menu item:

  • The process requires clicking on Lists, and from there, selecting the list with entries to merge
  • Name of the entry to e removed should e chosen and this should follow with a click on Edit.
  • Next step demands clicking on Merge and selecting entry name to keep and choosing Merge to merge the entries.
  • Finally, click on Yes for confirming the process to merge list entries in QuickBooks.

Check also: QuickBooks Tool Hub

This brings readers to an end of this discussion, whose prime motive was to help readers get an understanding of how to merge list entries in QuickBooks Desktop. Our support services are always available for all QuickBooks users. You can be reached out through chat support.

Learn how to fix missing employee in QuickBooks Desktop

Methodologies to Fix Missing Employee in QuickBooks Desktop Payroll

A Complete guide to resolve missing employee in QuickBooks Desktop payroll.

Missing Employee issue can be encountered as the user tries to run the payroll. The issue of missing employees can be observed as the user attempts to access the employee center. In many such cases, the employee may have been set to inactive state.  This issue can also be encountered when running a scheduled or unscheduled payroll. In such cases, employee may not be linked to the correct payroll schedule. There are different avenues to get this issue resolved. Make sure to read this article all to the end to fix missing employee in QuickBooks Desktop Payroll.

Main Triggers for Missing Employee in QuickBooks Desktop Payroll error?

The major causes due to which the employee may be missing in QuickBooks Desktop Payroll are:

  • The Employee you are attempting to access is inactive.
  • Employee has been terminated or has a specific release date.
  • Not being added to the payroll.
  • Employee not being linked to the correct payroll schedule can also be  a major reason behind a missing employee.

Recommended to read: Fix QuickBooks Banking Error 179

Workable Approaches for Fixing Missing Employee in QuickBooks Desktop Payroll

The QuickBooks Desktop issue involving missing employee can be caused in different instances. The procedure for getting this issue fixed is discussed below.

Scenario 1: If the Employee is missing in the employee center

Here are some process you need to follow.

  • To start off, the first process involves clicking on the Employees tab.
  • Following that, the next step requires clicking on the Employee Center option.
Employee-Center-Image
  • Corresponding to the Employee name, you are supposed to follow up to the drop down option and then make a choice for All Employees tab.
  • This should follow with an identification of the missing employee.  Once identified, the next process requires clearing the X mark on the left side of the employee.
  • This should be followed by clicking on dropdown besides the employee and then making a choice for Active Employees.

Scenario 2: If the Employee is missing in both the scheduled as well as unscheduled payroll

  • The first step requires going for the Employees tab, which should then be followed by a hit on the Employee center.
  • Get into the employee by double-clicking on its name.
  • This should be followed by a click on Employment Info.
Employment-Information-Image
  • The user then needs to get the Employment Release Date field cleared.
  • Once the steps are being followed cautiously, the next step is to go for running the payroll again and then double-checking if the employee which was missing previously is now showing up.

Check also: Fixing Potential Data Issues In QuickBooks Desktop

Scenario 3: Employee being on the wrong pay schedule

Follow the steps given below.

  • Make a visit to Payroll and followed by that go to Employees
  • Herein, you need to click on employee
  • The next step requires going to the Employment details and clicking on Start or Edit
  • Then, choose the Pay Schedule dropdown and go for the creation of pay schedule for the employee
  • Once that is completed, the next move is to click on Save.

Scenario 4: Release date already entered

  • At first the user requires to head to Employees, and from there click on Employment Center
  • This should be followed by double-clicking on the employee and selecting the Employee Info option
  • Followed by this, a check should be made on the release date. If some release date is already showing up, get it removed and save the changes.

You may also read: Troubleshoot QuickBooks Online Dependent System Error

Scenario 5: Employee being set up as Owner

  • To get this cause of Missing Employee in QuickBooks Payroll fixed, the initial process is to go for the Employees tab and then go to the Employee Center.
  • Double-click on the missing Employee and then visit the Employee Info.
  • Here, you are required to check if Owner is being listed besides Employment Type. Make a choice for the dropdown and make choice for the correct employee.
  • This should be followed by a click on Ok.

The present blog encapsulated multiple scenarios due to which missing employee in QuickBooks Desktop Payroll issue may show up and also discussed multiple troubleshooting methods to fix a missing employee in QuickBooks Desktop. If you come across such issue again, you simply can reach out to our proficient experts at the helpline or connect to our chat support.

How to Resolve QuickBooks Error 15276

What are the Tactics for Getting QuickBooks Error 15276 fixed?                            

QuickBooks Error code 15276 belongs to the category of update errors. This issue has been bothering many QuickBooks users and has been preventing users from getting their QuickBooks copy updated to a newer version. Although it is not mandatory for users to update their QuickBooks copy, updates should be added to the pipeline considering the features that come along in every new update. Nonetheless, Error code 15276 is mostly encountered as an error message Error 15276: The payroll update did not complete successfully. Some files to be updated were in use and could not be replaced.”

Our experts have come up with this blog featuring different workable solutions to guide you through QuickBooks Error 15276.

QuickBooks-Payroll-Error-15276-Image.png

What is the major reason for the occurrence of QuickBooks Error code 15276?

Update errors in QuickBooks can have different causes. QuickBooks Error 15276 has specific causes that may promote its occurrence. Below have been discussed some of the most common causes of this error.

  • QuickBooks program installed is either incompatible with the Operating system or has been installed improperly.
  • QuickBooks Tax Table has not been updated to the latest version, or else the Tax Table is incompatible.
  • The subscription of QuickBooks has expired.
  • A malicious program was installed in the background either by the user or without his/her knowledge. Virus can impact the integrity of your installer files by causing corruption in them.
  • Digital signature certificate for Intuit is not updated yet.

How can QuickBooks Error code 15276 be fixed?

Different methods can be adopted for the resolution of QuickBooks Error code 15276. These workable solutions have been briefly explained in detail as follows:

Method 1: Trying the Quick Fix My Program Tool

The Quick Fix My Program feature is a quick method to resolve different technical issue in QuickBooks including QuickBooks Error code 15276. The steps are:

  • The first process involves opening the browser and navigating to the Intuit website.
  • From there, go for downloading of the QuickBooks Tool Hub program and then go for installation of the tool.
QuickBooks-Tool-Hub-Icon.jpg
  • After the successful installation process, launching Tool Hub and soon after visit the tab named “Program Problems” in the left pane.
  • From here, the next move should be to click on Quick Fix my Program.
Program-Problems-tab-in-tool-hub
  • Start the scan process immediately after and wait for the diagnosis to process and reach to the conclusion. When it is done, all issues will automatically be addressed by the tool and you should then be able to update QuickBooks without the occurrence of QuickBooks Error code 15276.

Method 2: Termination of the Qbwebconnector.exe service

There may be a chance that Web Connector is facing certain issues which can indirectly impact the update process. Although this is not a common source of QuickBooks Error 15276, but termination of the Webconnector.exe service has successfully fixed the issue in many cases. The process to do it is discussed as follows:

  • The first move is to go for the Task Manager. For this, the short keys are Ctrl + Alt + Delete.
  • This should open a new window from where you need to click on the “Open Task Manager” option.
  • As the Task Manager window evolves, go for the Services tab and scroll through the list of active services to identify QBwebconnector.exe service.
End-QBConnector.exe-process-Image
  • Soon after you are able to see the service, go for the tab named “End Process”.
  • When the service is successfully terminated, you can again launch QuickBooks and try to process the update again. This time around, the process should not be interrupted by QuickBooks Error code 15276.

Method 3: Update Latest Tax Table

If Tax Table is not updated to the latest compatible version, this can directly be a major contributory cause of QuickBooks Error 15276. This can be done through the Employee tab within QuickBooks and the steps are:

  • Proceed with the launch of QuickBooks Desktop and as it gets opened, tap on the Employees tab.
  • From here, the next move to make is to go for Get Payroll Updates and from there, click on the option to Download Entire Update.
Get-payroll-updates-Image.png
  • Followed by making a choice for the option “Download Latest Update”.
  • This should trigger the update process and it shall set up the Tax Tables to their latest versions. If this process fails, you can go to the official website of Intuit and from there, you can download the Tax Tables manually. This has worked as a potential fix against QuickBooks Error code 15276 for many users.

Method 4: Setting up the latest Digital Signature Certificate for Intuit

As a QuickBooks user, you need to ascertain if the correct Digital Signature certificate has been set up on the system for Intuit. This is crucial because it can contribute to a plethora of unexpected errors, including QuickBooks Error code 15276. The steps to be followed are:

  • Stat by going to the directory where is installed. By default, it is the C drive.
  • Search for the Intuit folder, and then go into the QuickBooks folder.
  • This should be followed with a right-click on the QuickBooks executable file, which needs to follow up with a click on Properties.
  • As the Property window shows, the next move is to click on Digital Signature, and then making a choice for Intuit Inc.
Digital-Signature-Details-Image
  • This needs to immediately follow with a click on Install Certificate tab.
Install-certificate-image
  • In the next window, click on Next and allow the process to reach to its completion. You can later run QuickBooks and try the update process in QuickBooks. This should evade QuickBooks Error 15276.

Method 5: Try the System Restore feature

At times, a newly installed program in the computer can be a potential source of malicious files and viruses that can proliferate to the QuickBooks files. This can be a source of corruption in the QuickBooks installer files, resulting in update error 15276. A System Restore can fix this issue, but this can work only when a Restore Point has been created in the recent past. The steps are:

  • Go for the Start menu and from there, you need to search for “Restore” and open System Restore.
  • If any Restore Point is available, you should pick the latest one and then proceed with the Restore process.

Method 6: Perform a Complete Virus Scan

It is advised that you perform a full system scan on the computer making sure that QuickBooks folder is not added to the list of exceptions before performing the scan. Move any affected files to the Quarantine folder and when all such virus-infected files are separated out; go for Clean Install of QuickBooks.

Method 7: Clean Install QuickBooks

Clean Installation includes the following set of steps:

  • Go to the Control Panel and then Programs and Features, containing all the active programs on the system.
  • From here, you should make a choice for QuickBooks and get the program uninstalled by clicking on Uninstall/Change tab.
Uninstall-or-Reinstall-QuickBooks-Image
  • After the removal of the program, reinstall it but make sure that the QuickBooks folder has been renamed before reinstallation.
  • Use the license keys for activation and registration and check if QuickBooks Error code 15276 has been warded off.

Conclusion!

Within this article, our QuickBooks experts suggested different troubleshooting measures to guide users with the update issue QuickBooks Error 15276. The issue should be fixed by now, but in any case, if the problem keeps coming up on your system, qberrorsolutions is a one-stop solution for all your problems related to QuickBooks. You can directly call our experts or else connect with us trough the live chat option.

Fix QuickBooks Online Dependent System Error

Walkthrough to Effectively Troubleshoot QuickBooks Online Dependent System Error

Learn the Complete Guide to fix Dependent System Error in QuickBooks Online.

QuickBooks Online is the state of the art accounting program which has ushered astonishing growth of the accounting sector in the U.S. Notwithstanding its brilliant features, this accounting platform has faced different types of technical issues. One of the many issues which we shall be discussing within the purview of this discussion is the Dependent System Error. This error mostly troubles users as they try to print a report or go for exporting of the PDF file. While for some users the issue seemed a temporary problem which got resolved after re-logging into QuickBooks Online.

However, in most cases, the error continues to occur. In this article, readers shall get knowledge about this error and the different ways to get it fixed.

Also read: QuickBooks Tool Hub – Download, Install And Use It To Fix Errors

What are the Solutions to fix Dependent System Error in QuickBooks Online?

Different solutions have proven effective in rooting out this troublesome issue in QuickBooks Online. While clearing the cache has proven effective for many users, other fixes that have fixed the issue include the use of Incognito mode, updating the web browser, or by making slight alterations to the format of the reports. Let us go through each of these one by one to fix Dependent System Error in QuickBooks Online.

Fix 1: Clear cache in the browser

Excess cluttering of cache and temporary files can result in different issues within the browser. This not only effects navigability in the browser, but also opens grounds for different issues, including the Dependent System Error in QuickBooks Online. The process to remove the cache is easy and can be done as follows:

delete-all-the-cookies-files-in-the-browser
  • The first process requires opening of the browser. Let us take an example of Google Chrome.
  • Within the browser, go to More and click on More Tools.
  • This should be followed by a click on the checkbox besides the Clear Browsing Data.
  • You should follow up by clicking on All Time in the time range. As this is done, Place a checkmark on the checkboxes besides Cookies and Other Site Data as well as Cached Images and Caches Images and Files.
  • Then click on Clear data and wait all the way till the process is done.

Fix 2: Switch to Incognito Mode

Many a times, logging into QuickBooks Online in the Incognito mode can fix Dependent system error. This can be done by a simple click on the Menu button and then tap on the Open Incognito Mode option. While this is for Google Chrome, for other users if the option is not open this way, then you can use simple short keys given below corresponding to different browsers used in contemporary times:

BrowserShort key for Incognito Mode
Google ChromeCtrl + Shift + N
Mozilla FirefoxCtrl + Shift + P
Microsoft EdgeCtrl + Shift + P
SafariCommand + Shift + N

When the Incognito mode is open, you can navigate to QuickBooks Online, login, and then perform the same export process or printing process which was previously resulting in dependent system error QuickBooks Online. The error should be bypassed this time.

You may also read: Fixing Potential Data Issues In QuickBooks Desktop

Fix 3: Make changes to the Report format

If you are facing this error while exporting the report in PDF format, you should consider choosing two choice boxes for the smart Page Breaks. This should be followed by repeating page header in “New”. After this, re-perform the same operation to check if dependent system error in QuickBooks Online is fixed.

Fix 4: Update your Browser

You should make sure that the browser you use to navigate to QuickBooks Online is updated to the latest version. This can be done through the browser or by navigating to the official website of the browser. After updating the browser, open QuickBooks Online and login to your browser. You can then try to open the same report or convert it to the PDF and export. This should fix Dependent System Error in QuickBooks.

The current discussion focused entirely on a peculiar error of QuickBooks Online dependent system Error. If you need technical help, it’s just a tap away. All you need to do is click on our chat support option or else you can also access our team of QuickBooks experts.

How to Download, Install QuickBooks Tool Hub

QuickBooks Tool Hub – Walkthrough to Download, Install and Use it to Fix Errors

QuickBooks Desktop has huddled a widespread recognition in the accounting community. This has been possible due to the unimaginable accounting features that have been evolving in the program with every new update. But technical issues also keep evolving due to the complicated framework of this accounting marvel. These issues can be associated with installation-related problems, potential data issues in the QuickBooks Desktop, or issues related to invoice. To keep these in check, Intuit offers a composite umbrella QuickBooks Tool Hub containing different types of features to fix technical errors.

Read the article all the way till the conclusion to get an understanding of the multifaceted functionalities of QuickBooks Tool Hub and the easy process to Download and Install this all-in-one tool.

What is QuickBooks Tool Hub?

QuickBooks-Tool-Hub-Icon.jpg

QuickBooks Tool Hub is a free to use repository of different tools to address variegated errors encountered in QuickBooks. It can fix Company file errors, Installation errors, update errors, network issues and technical issues that lead to sudden crashing and glitches while working on the accounting program. It is an all-in-one tool to effectively resolve all your QuickBooks problems at the click of a button.  In addition to troubleshooting contemporary unsolvable issues, QuickBooks Tool Hub can also be used to Reset Password and Clean Install QuickBooks.

Recommended to read: Different Techniques To Troubleshoot QuickBooks Banking Error 179

Different Tools in QuickBooks Tool Hub

Some of the noteworthy tools of QuickBooks Tool Hub along with their description are listed in the table below:

ToolDescription
QuickBooks File Doctor Tool  Troubleshoots Company files and fixes Potential data issues in QuickBooks Desktop
QuickBooks Install Diagnostic Tool  Resolves Installation and update issues in QuickBooks Desktop
QuickBooks Clean Install ToolUsed for uninstalling and reinstalling QuickBooks in case of some major irreparable issues
QuickBooks Password Reset Tool  Used to reset a lost password while logging in to QuickBooks
QuickBooks Connection Diagnostic Tool  Rectified any Connection issues.
QuickBooks Refresher  Fixes issues with QuickBooks installation
PDF and Print Repair Tool  Troubleshoots Printing and PDF related issues
Condense Data Tool  Used for compressing the Company file to allow it to be shared over emails.

What types of errors can be fixed using QuickBooks Tool Hub?

Tool Hub can be effectively used for rectifying errors caused due to different sources. Users should feel no hesitation in resorting to this tool considering it to be rolled out by Intuit, the maker of QuickBooks. Recall any technical issue in QuickBooks and if manual steps seem futile, QuickBooks Tool Hub shall automatically diagnose and fix the issue permanently without you having to take any arduous measures. The different types of errors that can be fixed using the Tool Hub include:

QuickBooks Update errors

Updating QuickBooks is necessitated due to new features being added in every new update which rolls out. But users have noticed an array of technical error codes during the update process. These include

QuickBooks Error 12xxx – includes QuickBooks Error 12002, 12007, 12009, 12029, 12031, etc

QuickBooks Error code 15xxx – includes QuickBooks Error 15102, 15240, 15270, 15222, 15276, etc

Company File Issue

Company files constitute the cornerstone of all accounting operations in QuickBooks Desktop. Whatever modifications the user makes on the accounting ­­data are stored in the form of different Company files. There are instances when these files face technical issues that result in the user’s inability to access them. This can lead to a state of panic with an apprehension of potential data loss. But in such cases, you can either backup your Company file, or else, make use of the QuickBooks File Doctor Tool, one of ­the many tools available in the QuickBooks Tool Hub. The errors in the Company file include the following:

  • QuickBooks Error 6xxx – including Error 6000, 6210, 6150, 6000 77, 6177, 6000 83, etc.
  • Unrecoverable error 00000 00000
  • Company File Is Missing or Cannot Be Found
  • QuickBooks Error code C=51
  • QuickBooks Error code 80070057 – The Parameter is incorrect

Network Issues

Fix-my-network-Tool-hub

Network issues in QuickBooks are prominent when you try to establish QuickBooks In the multi-user mode or when connecting the financial institution through QuickBooks. The network issues in QuickBooks generally manifest in the form of Error code H101, H202, H505 and other errors in the Hxxx series. These can be fixed using the different troubleshooting tools available in the Network Issue tab in the left pane of the QB Tool Hub.

Misplaced or Forgotten Password

Reset-password-Tool-hub

QuickBooks Tool Hub is also useful in situations wherein you forget your login password. This can evoke complicated panicking situation. However, Tool Hub has a solution for you. One of its tools, QuickBooks Password Reset Tool can be relied in such cases. The tool automatically facilitates resetting of the password to allow you to create a new one without having to resort to any unsecured third-party tools.

PDF or Printing Issues

Printer issues appear only when you process a printing command but the input fails to transpire as a successful printing output. Printer problems are in most cases related to software aberrations, although hardware problems cannot be ignored. If you are unable to print a PDF, report or invoice in QuickBooks, QB Tool Hub can diagnose and resolve the issues instantly. Within the Tool Hub, QuickBooks Print & PDF Repair Tool needs to be run. It shall effectively rectify the issues at a click of a button.

Minimum System Requirements to run QuickBooks Tool Hub

QuickBooks Tool Hub demands minimalistic system requirements but failure to meet any of these requirements may lead to sudden crashing of the tool while opening or use of any of the troubleshooting features. The necessary requirements include Uninterrupted Internet Connectivity, Microsoft .NET Framework and latest compatible Microsoft Visual C++ Redistributable Package.

How to Download and Install QuickBooks Tool Hub?

QuickBooks Tool Hub is available for free on the official website of Intuit. The download file is named “QuickBooksToolHub.exe” which can then be run to ensure a successful installation of the Tool Hub.

QuickBooks-Tools-Hub-Installation-Screenshot
  • The first step mandates opening the default browser from where you need to navigate to the Intuit website.
  • The Download page needs to be visited, wherein all the downloadable tools by Intuit are available. These include the Tool Hub, which can be downloaded by clicking on the version and then tapping on Download button.
  • You can then proceed to the Download folder, where the file named “QuickBooksToolHub.exe” should now be visible. This can be opened by double-clicking on it. We suggest opening the file as an admin by a right-click on the file, followed by a click on Run as Admin option. The InstallShield Wizard opens with instructions to guide you through with the installation process.
  • During the process, you should make sure to click on “Yes” on the “License Agreement” prompt. A hit on “No” shall immediately halt the installation and close the installer.
  • When it comes to the installation directory, the path chosen should be “C:\Program Files\Intuit\” as this is the default location of QuickBooks folder (If not manually changed). A tap on “Install Now” begins the installation.
QuickBooks-Tools-Hub-InstallationScreenshot
  • QuickBooks Tool Hub can be launched soon after by a simple click on “Launch QuickBooks Tool Hub” checkbox.

Bypassing QuickBooksToolHub.exe blocked error

The download file for QuickBooks Tool Hub is “QuickBooksToolHub.exe”. This file needs to be opened for the initiation of the installation. Some users have been unable to move any further due to the blocking of the process by Windows Defender or any other Firewall Protection Program running in the background.

  • This problem can be bypassed by clicking on More Info option on the error screen.
Windows-Protected-your-syetem-Image
  • This needs to follow up with a click on Run Anyway button.
Windows-Protected-your-syetem-Image
  • This will enforce the installation process. You can then proceed with the installation.

We reach the conclusion of this discussion. This article revolved around QuickBooks Tool Hub and emphasized its features and some common QuickBooks errors solvable by the use of this tool. A detailed walkthrough with easy steps to “Download and Install QB Tool Hub” was also explained. You can share your queries with our QuickBooks experts anytime by reaching us through chat or the helpline number.