QuickBooks Error 7300 is one of the most frequently reported problems that appear in the QuickBooks accounting application. This error can happen on the program configuration, Windows loading or closing, or when the company file is being opened. Such an error can make the users lose access to the company data files and can practically hinder the use of the software.
In this article, we will discuss QuickBooks Error 7300 in brief and also describe its causes and possible fixes. Let’s get started
Causes of QuickBooks error code 7300
QuickBooks Error code 7300 is another name for QuickBooks sync manager error 7300 and its causes are different. They include poor installation of QuickBooks or its updates, and the presence of corrupted or damaged QuickBooks data files that make synchronization difficult, triggering the appearance of Error 7300. Moreover, problems concerning the Windows registry, the presence of other programs that operate with QuickBooks, and malware or virus interference can be the causes of this error as well. These factors can result in sync issues with Intuit servers, data inconsistency, error messages such as “Error 7300: “QuickBooks has encountered a problem and needs to close,” and some performance problems that may include slow performance or even freezing when attempting to open or to sync the company file.
Possible signs and symptoms of QuickBooks error code 7300
Several features, processes, and symptoms show that QuickBooks Error code 7300 is apparent and has a large impact on how the software works. The users can face issues with synchronization, they will not be able to take the data and run it through Intuit servers, and, thus, have the records that are out of sync. The appearance of a notification message showing “Error 7300: A message like “QuickBooks has encountered a problem and must now close,” is a dead give-away for this error. In addition, users can use performance issues as the company file slows down, restarts, or crashes when the user attempts to open or sync the company file with Error 7300.
How to resolve QuickBooks Error Code 7300
Solution 1: Manual steps for Windows and Vista
When trying to fix QuickBooks Error 7300 in Vista and Windows 7, proceed to the Control Panel to open the Programs and Features section. Find the program that has caused the error and go to its uninstallation procedure.
For Windows 8, you can right-click the Start-up menu, and follow similar steps. The users on Windows XP must locate the Add or Remove applications option to remove the faulty application. The flow of activities is as follows: clicking on the options on the screen as described in these steps should work to fix the error without trouble.
Solution 2: Back up QuickBooks related registry entry
As a requirement to fix QuickBooks Error 7300, it is necessary to back up the concerned registry entry. Thus, the users gain the possibility to open up the registry editor and specify the key that corresponds to the error in question before copying the relevant data to a safe file with a .reg file extension. Such a measure can prove useful in preventing future loss of data, as well as make the fixing of problems easier to address.
Solution 3: Resolve issue related to a software installation
In case the error 7300 does not go away, the users can try to delete QuickBooks and rename Intuit folders in several directories. Specifically, in cases when the renaming of folders ends with the “Access denied” message, it is possible to solve the problem by using the Task Manager and then terminating the indicated processes. Further on, reinstallation of the QuickBooks desktop application can often help and eventually fix the problem.
Solution 4: Validating and Reconstructing
Data File Integrity Open QuickBooks Desktop and go to the company file location inside QuickBooks. This is done by going to the File, then Utilities, then verify data and QuickBooks will then automatically scan your company file for any problems. If there is a mismatch, go to the File, click Utilities and select Rebuild Data to reverse the data file construction however, it is recommended to back it up first.
Confirmation and Reconstruction of Data File Start by running QuickBooks Desktop and then log into the company file of your choice. Go to File then click and choose Utilities, and click on Verify Data to find out pre-eminent company file anomalies. If such are present, it is advisable to go to the File menu and then use the Utilities option to Rebuild Data. The guidelines displayed on the screen should be followed when reconstructing the data file while one should also be careful with a backup copy.
Solution 5: Fixing Installing of QuickBooks
The user needs to access their Control Panel and go to the Programs and Features section to identify QuickBooks in the list of programs installed. Choose to repair the installation and do the steps provided on the screen correctly. After the repair process, try to reopen the QuickBooks software and check if the issue has been fixed.
Solution 6: Ensuring QuickBooks is Updated to Current Version
Start QuickBooks Desktop on your computer once you have launched your computer. Next, for help-finding, choose Update QuickBooks Desktop from the Help menu. Continue to click on the Update Now option, then make sure all the checkmarks are on for the available updates. This should be accompanied by restarting QuickBooks and trying to synchronize the two for the second time, in a bid to check the improvements made by the update process.
Solution 7: Run QuickBooks Install Diagnostic Tool
Go to the QuickBooks official site and download the QuickBooks Install Diagnostic Tool. Run the tool after you have closed all the running applications. Stick to the invitations that are displayed on the tool’s screen to detect and resolve any installation-related problems. After the full completion of the process restart your computer and see whether the error message is still on.
Solution 8: Scan for virus and malware threats
Ensure that your antivirus software is in current updates, use the antivirus to scan your system, and use it to remove all viruses and malware that might be in your system. Once the scanning process is complete, turn off your computer turn it back on, and check if the error persists. Here are some guidelines that can be followed to ensure the system environment is secure to support QuickBooks.
Winding up!
However, if QuickBooks Error 7300 persists then the above-stated solutions could be implemented as provided below; If nothing has changed, then it will be advisable to seek further support from our team with dedicated QuickBooks error support number +1-844-926-4607 professionals. Thus, our team of specialized professionals is available to provide round-the-clock services that will help address QuickBooks’ errors and enable the software to operate effectively.
QuickBooks is one of the most beneficial applications to aid business entities in handling their financial operations. However, working on technical difficulties like the QuickBooks File Doctor not working, or won’t open error, can hamper productivity. In this detailed guide, we will discuss the causes of this particular problem, talk about the QuickBooks File Doctor tool, the kinds of errors that the tool can identify and solve, the drawbacks of the QuickBooks File Doctor, as well as its efficient usage to solve the current problem.
It is time to fix QuickBooks File Doctor not working to avoid future complications and to make the program run without problems.
Download QuickBooks File Doctor
To request QuickBooks File Doctor or to obtain it, you can use the QuickBooks Tool Hub to download this application.
Even more, the tool may contain newer versions of QuickBooks, with which the user’s software may not be compatible.
It is also worthwhile to view the errors that can be solved with QuickBooks File Doctor since you may well be able to fix them on your own if you attempt to work out the potential problems that can be solved with the tool.
QuickBooks File Doctor is capable of addressing a range of errors and issues, including:
Vendor or customer list, or list of employees who were recorded to have made transactions with the company but whose records are not retrievable from the company file.
Drawbacks to Be Aware of for QuickBooks File Doctor
While QuickBooks File Doctor is a valuable tool, there are certain limitations to be mindful of:
The tool has to be run with the Administrator credentials
Files in the specific Company that are larger than 2 GB cannot be processed.
Microsoft. NET Framework needs to be installed for this tool as it will be used for its proper functioning.
Ways to fix QuickBooks File Doctor that is not working
The QuickBooks File Doctor may encounter issues due to various reasons, including:
Trying to open the files which are either in a wrong format or are partially downloaded
Incomplete file restoration attempts that are made by the system or a user.
Lack of some QuickBooks file
Problems that occur when converting a file in a network
Infectious or affected files(response 5)
How to Fix Issues with QuickBooks File Doctor not working or won’t open Error
If you are facing the error message “File Doctor is not working” or “QuickBooks File Doctor won’t open,” here are some troubleshooting steps you can follow:
Before the process it is advisable to check that the QuickBooks File Doctor you are using is the current version and if not, update it.
Scan for any corrupted QuickBooks files which are causing page not to work correctly.
Check that all QuickBooks needed files are available.
It is recommended to have a stable internet connection before starting the usage of the tool.
Ensure that the tool is executed with administrative rights.
This way, if followed correctly, you are capable of handling and solving the QuickBooks File Doctor problems promptly, and continue with fewer interruptions within QuickBooks. Just bear in mind, that going over the potential issues in advance may help you avoid many problems and save the valuable time for your work.
Solutions if QuickBooks File Doctor is Not Working or Won’t Open
Any issues that may arise with the use of QuickBooks File Doctor should be resolved swiftly so that the affairs in QuickBooks do not grind to a halt. The following are comprehensive procedures to handle the QuickBooks File Doctor not working or won’t open problem.
Solution 1: Open up QuickBooks File Doctor in a Manual Check fashion
At other time, it might be helpful to launch the QuickBooks File Doctor through QuickBooks’ utilities – there might be specific problems that the File Doctor can detect and resolve on its own. Follow these steps:
Open QuickBooks and make a confirm with the fact that ‘No Company Open’ is displayed to you.
Go in the menu to [File] > [Utilities] > ‘Fix file and network issues’.
Proceed to open QuickBooks File Doctor after that right-click on it to make selections depending on the Windows version being used, and select run as an administrator, when a dialog box pops up click on OK.
In the case of the appearance of a dialog box, click on Yes.
To open QuickBooks File Doctor application, you will need to click the wrench icon.
Sign out after that other than the file you want to repair will be repaired with the new login that it has.
Under the Advance Options check mark ‘File Diagnosis Only’ and then click on the Next button.
Initiated by the system, open your file and look for a problem or perhaps a repair that needs to be made.
Should this not work, go to the next remedial process to ensure that the problem is solved.
Solution 2: How to Recover a Damaged QuickBooks Database
In cases where the QuickBooks file doctor is failing due to a corrupted file, restoring backups can be a viable solution:
Retrieve all copies with the lost contents that are in a damaged file to replace the affected file.
Select the Next button to proceed and select the option labelled as Local Backup.
Navigate and choose where the backup file should be created with the “. QBB extension”.
Yep, go for Open, and then Next.
Once you have decided the location you wish to restore your files click the Save button to conclude the restoration process.
Solution 3: Go to Auto Data Recovery Option
Utilize the Auto Data Recovery (ADR) feature within QuickBooks for automated file examination and recovery:
It reports to ADR and reviews files occasionally for possible anomalies or data errors helpful in data retrievals.
That’s it
It is necessary to treat QuickBooks File Doctor errors as a signal to solve the problem right away in order to avoid interruption of the company’s work. Subsequently, by observing the given processes and consulting a professional in case of any difficulties, you will be able to optimize the peculiarities of QuickBooks working.
In the twist of every new year, companies and people prepare themselves for the time when they will be compelled to submit files that are related to taxes, with printing W-2 forms as the first step. Regardless of whether you choose to manually print the W-2 forms and distribute them through your employees or if, on the other hand, file them electronically, the perfect understanding of the process of how to print W-2 forms in QuickBooks Desktop and Online will be helpful in the organization of the work at the end of the year.
Simplify Your Workflow with QuickBooks Desktop
If you are using QuickBooks Desktop for your payroll needs, printing W-2 forms can be a seamless process with the following steps:
First, go to Employees, then Payroll Tax Forms & W-2s.
Top on the list of the preferred options you need to select is Process Payroll Forms and from the list that will appear select the option Annual Form W-2/W-3.
You can set up the selection of a form according to the aforementioned steps and go further, creating the form.
Choose the employees for whom you plan to file the W-2 forms and then go to the printing/e-filing process.
To improve the chances of W-2 printing and avoid complications some necessary conditions that should be met by the QuickBooks user include; having an active subscription to the QuickBooks Payroll Enhanced or Standard service, updated tax tables, and appropriate printing supplies.
How to Print W-2 Forms for a Previous Year in QuickBooks?
If you need to print W-2 forms for a previous year in QuickBooks, follow these steps:
To get to the location, go to Taxes and select Payroll Tax.
Go to choices and scroll down to Filings and select Archived files and forms.
Decide on the dates that need to be filled or look for all the relevant papers that had been misplaced.
Move the cursor under Select View to print a W-2 or W-3 form.
Choose the Reader toolbar and find out that the Print icon is available Then, select Print once again.
Furthermore, the reissued W-2s should say “REISSUED STATEMENT” at the top part and the W-2 instructions if the W-2 was lost or never distributed to the employee in the first place.
W-2 Form, Buying W-2 Paper, and Printing W-2 on QuickBooks
Indeed, specific recommendations on how to print W-2 forms quickly and efficiently exist and are associated with the acquisition of W-2 kits in QuickBooks. Follow these steps to order your W-2 kit and proceed with printing:
Go to QuickBooks, and sign in: Access Supplies & Checks and select Tax Products.
Select W-2 Blank Kits and proceed with your order on the Web following the prompts on your screen.
When you have your W-2 kit, start imitating W-2s and W-3s beginning from the Jan 1 of the current or prior year.
Below are some measures that you should follow carefully as highlighted in QuickBooks to print W-2 forms for employees.
Instructions on Printing, Saving and E-mailing of the Employee W-2 Forms using Adobe Reader
For a seamless printing and distribution process of employee W-2 forms, you can use Adobe Reader following these steps:
To view the payroll tax table, open QBO, enter the Payroll Tax Center then go to Employees.
Payroll Center, then go to the File Forms.
Choose View/Print & W-2s and type in the payroll PIN.
Access and/or print specific employee W-2 forms using Adobe Reader.
Store the file of employment on your system and within the process e-mail the employee.
Recapturing Employee W-2 Forms in QuickBooks for an Employee who Quit their Job, and Printing Them
Should the need arise to reprint a lost employee W-2 form in QuickBooks, you can follow these steps for a seamless process:
In the QuickBooks File, go to Payroll Tax Center then select Employees.
Payroll Center is to be accessed and then File Forms sub-section is to be opened and the View/Print Forms & W2s option has to be chosen.
Enter your payroll subscription PIN and indicate the W-2 form of the concerned employee for reprinting.
Make sure that by reprinting the forms, the wordings “REISSUED STATEMENT” appear clearly on the forms for efficacy.
Further, another procedure of re utilizing lost W-2s in the address sheet involves utilizing the Saved Filings from the Filing History in the accomplishment.
Conclusion
It is clear that both for the current, previous, and in the case of lost forms, W-2 can be printed in QuickBooks using the above-stated methods as well as the features offered by the integrated program. Thus, following the descriptions of the steps, which are given below, corporations can optimize their year-end activities and meet the legal requirements regarding taxes. The above outlined tips and guidelines can always allow one to wade through the different steps needed to print W-2s in QuickBooks with ease.
The article give a reflection on ‘How a QuickBooks user can Import QBO file Into QuickBooks Desktop/ workstation’. QBO or QuickBooks Online file contains data set related to banking statement of an organization stored in QuickBooks Database. This Database is generated when the user QuickBooks bank feed in View section relates to online banking system of his bank. The transactions are simultaneously generated by the bank itself and can be downloaded in electronic form. Thus, QuickBooks is facilitating all types of business needs.
Importing QBO file is necessary as the data instantly gets in the QuickBooks records without doing manual entry of each record in workbook. To know more about importing QBO file into QuickBooks desktop, read the quick guide thoroughly, else you can seek experts help.
Need for importing QBO files:
Keep your records upgraded.
Each record is accounted, no omissions.
Viewing the transactions and performing operations have become easier.
Elimination of manual entry in QuickBooks.
No error while transmitting bank information.
Reconciliation features has prevented data loss in QuickBooks.
How often it is required to import QBO file into QuickBooks Desktop?
Normally the transactions of the bank are generated either at the accounting year or periodically (monthly or quarterly depending on the user requirements).
It is recommended by the users itself to generate the bank statements frequently so that can keep track record of all clients efficiently.
Accountants make short term financial reports such as balance sheets, profit and loss account, cash flow statements, expenses and incomes account with these electronic documents.
The bookkeeping in QuickBooks, thus, becomes easier.
Method to Import QBO file into QuickBooks Desktop
Procedure to import a QBO file:
Login into QuickBooks Desktop.
Click on File menu > select Utilities.
Click on Import option and select ‘Web Connect Files’.
Select downloaded QBO file from institution i.e. bank has provided.
Select ‘Use an Existing QuickBooks Account’ > Bank Name > click on Continue button to see all transactions.
Your QBO file data is imported.
For checking record, click on ‘Transaction List’.
You will see payee column is null, preset settings i.e. rules to autofill the column.
Methods to make Rules for Importing of .QBO file
Method 1
The process for making Rules for Import of .QBO file are:
Click on Rule > from drop down menu select ‘Manage Rules’.
Select Add New and type name of rule.
In Description Field, select from memo ‘Common Contains’.
Rename and click on ADD to enter payee name.
From Category, type Accounting Field and click save.
To change rules:
Select the Rule to change.
From Action Column, select ‘Edit Rule or Delete Rule’.
Edit is to rename it and delete is to remove a particular rule not required.
Method 2
Login to QuickBooks Online, then under Banking Section, select existing account.
At top-right side of the QuickBooks, an upload option is available.
Browse and look for .QBO file to open. Review the file items such as date range ID and name to check if the file is right. Click Next.
Review the transactions from Review section.
Checklist to merge vendors and segregate transactions.
Importing .QBO file in Windows and Mac
Here are the steps to import .QBO file in Windows and Mac:
Windows:
Before you begin to import .QBO file, check if there is yellow strike icon is Turned ON, which is virtual direct download feature used to download new transactions. If you are importing .QBO file, then its better to turned off for convenience.
Open QuickBooks and Select lists menu.
Tap on Chart of Accounts.
If yellow strike occurs, skip to import.
Click on Edit > select Bank Feed Settings.
Turn OFF all online services.
Repeat until yellow strike icon disappears.
Now follow import. QBO steps.
Open File menu, then Utilities.
Click Import to select ‘Web Connect Files’.
For import, choose a .QBO file.
Select existing user account.
Go to data, then Continue button.
Go to transactions list for Review.
MAC:
Unlike windows has yellow striking icon, Mac OS has a blue ball icon, which is also required to Turned OFF.
In QuickBooks, go to lists menu.
Click on Chart of Accounts.
Click on Edit > select Online Settings.
Turn OFF and click on Save & OK button.
Repeat until blue ball icon disappears.
Now follow import. QBO steps.
Open File menu, then Utilities.
Under import click on ‘Web Connect Files’ option.
After this, choose a .QBO file for importing task.
Select existing user account.
Go to data, then Continue button.
Go to transactions list for Review.
Conclusion
The Quick Guide to Import QBO file into QuickBooks Desktop provides a comprehensive information regarding how you can import and make Rules for .QBO file. QBO file being an important file which contain bank statement of transactions of a particular period is required to import for ease of accessing data in QuickBooks. This is required in all type of business; big or small. Thus we came across steps for importing in Windows and for Mac users.
Find out which versions of QuickBooks is compatible with Windows 10.
QuickBooks being a most popularly used for all types of business accounts management software, known for its impeccable features related to maintaining records simultaneously, random transactions are calculated based on present instructions, helps to determine cashflow and outflows, etc. Before a user, wants to use QuickBooks 2024, he should first check all the requirements and pre-requisites to see if it is compatible with Windows 10.
The article gives a proper guide on which versions of QuickBooks is Compatible with Microsoft Windows 10 operating system. Read the comprehensive guide to know all facts related to it.
Windows 10 – Latest Updates
Let us first look at the latest updates and features of Microsoft Windows 10, before proceeding on the QuickBooks version which are compatible with Windows 10:
The start menu of Window 7 and Windows 10 are similar.
Windows 10 is complimenting Latest update of Internet Explorer 11, i.e., specifically EDGE, with more enhanced features.
Task switcher of Windows 10 is commendable, which is a virtual desktop. You can change the names of virtual desktops.
The .NET Framework4.6, latest version for Window 10, is capable for finishing multiple tasks simultaneously. It’s a fact that because of latest version of .NET Framework 4.6, reason for its biggest sale.
Update options can be configured in new versions.
Task manager contains GPU temperature and disc type.
Uses a Linux Kernel with WSL2.
Limitations on bandwidth updating.
Ease in control of optional updates.
Methods to Search QuickBooks Software Compatibility with your Windows 10
It is necessary to check and install only the version of QuickBooks which is compatible with the latest version of the Windows 10 operating system. This is to access most of the QuickBooks impeccable features, which QuickBooks releases on its official website. Though Windows 10 latest version has enabled the no requirement of updating operating system every time.
Thus, follow the methods to check if your Windows 10 is compatible with the latest version of QuickBooks:
Go to Start menu > then click on ‘About your PC’ in search box.
A Windows Specification window opens.
Scroll down the window and check Windows version.
See if this version number is certified and compatible with QuickBooks version.
Need of QuickBooks Desktop Compatible with Windows 10
Reasons for the need of QuickBooks 10 to be compatible with Windows 10 version are:
Bill tracker is supported by Windows 10.
Advanced Reporting features.
Capability of removing multiple transactions with the bulk clear send forms.
Supported Versions of Windows 10 for Desktop Pro, Enterprise and Premier
The users who want to use QuickBooks should know which version of Windows 10 is compatible with the software. Let’s look at the supported versions for QuickBooks Desktop Pro, Premier, and Enterprise with Windows 10.
Supported Windows 10 version are as follows:
Windows 10 Version 1809- Microsoft Corporation of Windows 10 Version 1809 supports all QuickBooks versions (Pro, Premier and Enterprise). It is the newest and second release of Microsoft. It is also compatible with Version 1803.
Windows 10 Version 1709- Inuit company always updates their products for the user requirements and to be compatible with Windows. Released version of QuickBooks Desktop Pro, Premier, and Enterprise between 2017-2020, all support Windows 10 Version 1709.
Refer to the table for Windows10- QuickBooks Compatibility:
Windows 10 Versions
QuickBooks Compatibility
Windows 10, Version 1809
QuickBooks 2020
Windows 10, Version 1803
QuickBooks 2017, 2018, 2019, and 2020
Windows 10, Version 1709
QuickBooks 2017, 2018, 2019, and 2020
Windows 10, Version 1507, 1511, 1607, and 1703
Not Compatible with QuickBooks
Windows 10, Version 1507, 1511, 1607, and 1703 (Unsupported Versions)
These versions are not compatible with QuickBooks. QuickBooks Pro, Premier, and Enterprise do not work properly with the outdated versions of Windows 10. So it is recommend to use only the latest updates of Windows 10 to access distinct features.
QuickBooks Versions that Run on Windows 10
Every latest QuickBooks version has its own necessities and distinct features from the old versions.
This information is necessary for the user, as he / she can download the exact suitable version, so that there is no technical glitches which may hamper the performance of the QuickBooks. Here is a list of QuickBooks Desktop versions which are compatible with Windows 10, it comes with different specifications:
QuickBooks Desktop 2024
QuickBooks Desktop 2023
QuickBooks Desktop 2022
QuickBooks Desktop 2021
QuickBooks Desktop 2020
QuickBooks Desktop 2019
QuickBooks Desktop 2018
QuickBooks Desktop 2017
Here is table which gives a clear view for the QuickBooks Versions which are compatible with Windows 10. This table provides an insight to the compatibility status of 2014, 2015, 2016 and 2019 QuickBooks Pro version with Windows 10.
QuickBooks Version
Compatibility With Windows 10
QuickBooks 2010
Not Compatible
QuickBooks 2011
Not Compatible
QuickBooks 2012
Not Compatible
QuickBooks 2013
Not Compatible
QuickBooks 2014
Not Compatible
QuickBooks 2015
Compatible
QuickBooks 2016
Compatible
QuickBooks 2017
Compatible
QuickBooks 2018
Compatible
QuickBooks 2019
Compatible
QuickBooks 2020
Compatible
QuickBooks 2021
Compatible
QuickBooks 2022
Compatible
QuickBooks 2023
Compatible
QuickBooks 2024
Compatible
Experts suggest to always keep your Windows and QuickBooks versions updated to avoid any kind of disruption. If you are using 2014 or earlier version of QuickBooks, then you need to enable Microsoft .NET Framework 3.5 which will make it compatible with Windows 10.
Following are the compatibility requirements by Windows 10 to work with QuickBooks effectively. These are some steps helps you to update and improve the recent software available on your PCs.
QuickBooks Desktop 2022
The following is available for download in various versions, such as Pro Plus 2022, Pro Plus 2022 Payroll, Premier Plus 2022, Premier Plus 2022 Payroll, Accountant, Mac Plus 2022, and Enterprise 22.
Features:
The latest features of QuickBooks Desktop 2022 are as follows:
Uploading documents
Procedure for approving bills
Automated Invoice Entry and personalised Invoice pay slips
Webgility – the QuickBooks biggest channel for online sellers and , provides an e-commerce platform.
Operating system such as Windows 8.1 and Windows 10.
Windows server 2011, Windows Server 2012 R2, Windows Server 2016 and Windows Server 2019
Internet Explorer 11- 32 bit with stable network connection
Processor with clock speed of 2.4 GHz required
Minimum RAM of 4GB, recommended 8 GB RAM
Free storage space – 2.5 GB
An Optical Drive; 4X DVD-ROM drive for CD installation.
Two extended monitors, screen resolution- 1280*1024 or above required.
Microsoft Office 2010, Office 2013, Office 2016, and Office 2019 are all provided.
QuickBooks Desktop 2021
It is for all users such as Pro 2021, Mac, Enterprise 21.0, Premier, and Accountant, QuickBooks 2021 is available for download with latest features, error fixes, enhanced performance, etc.
Features
The features of QuickBooks 2021 are created enabling time management and efficiency. Some of the features are:
Operating Systems such as Windows 7 SERVICE PACK 1, Windows 8.1 and Window 10
Windows Server 2008 R2, Windows server 2011, Windows Server 2012 R2
Internet Explorer 11- 32 bit with stable network connection
Processor with clock speed of 2.4 GHz required
Minimum RAM of 4GB, recommended 8 GB RAM
Free storage space – 2.5 GB
An Optical Drive; 4X DVD-ROM drive for CD installation.
Two extended monitors, screen resolution- 1280*1024 or above required.
Microsoft Office 2010, Office 2013, Office 2016 are all provided
QuickBooks Desktop 2016 R7 and Later
With the QuickBooks 2016 R7 you won’t face any compatibility issues and switch to the Windows 10 operating system. But if the user is using R7 version of QuickBooks, upgrade it to the latest version from Inuit website of QuickBooks for using most advanced features of Bookkeeping.
Features
Following are the features of QuickBooks 2016 R7 for Pro, Premier, Accountant and Enterprise:
QuickBooks Statement Writer
Send Forms by Batch
Continuous Feed Label Printer Support
Streamlined Updates
Autofill Ship-to-Address
Payments Search Options
Fiscal Year to Last Month Report Filter
Requirements
Operating Systems such as Windows 7, Windows 8.1, Windows Vista
Windows Server 2003 SP2, Windows Server 2008, Windows Server 2008 R2, Small Business Server 2008, Windows Small Business Server 2011, Windows Server 2012
Internet Explorer 11- 64 bit with stable network connection
Processor with clock speed of 2.4 GHz required
Recommended 8 GB RAM, Minimum RAM of 4GB required
Free storage space – 2.5 GB
An Optical Drive; 4X DVD-ROM drive for CD installation.
Two extended monitors, screen resolution-1024*768 or above required.
Microsoft Office 2010, Office 2013 are all provided.
QuickBooks Desktop 2015 & 2016 (Release 1-6)
Following are the features of QuickBooks version 2015 & 2016 for Desktop versions such as Pro, Premier, Accountant and Enterprise:
Online payments are updated.
Updated Reminder window
Home window has insights tab
Pinned notes
New Report Formatting
Income Tracker updates
Requirements
Operating Systems such as Windows 7, Windows 8, Windows Vista, Windows 10
Windows Server 2003 SP2, Windows Server 2008, Windows Server 2008 R2, Small Business Server 2008, Windows Small Business Server 2011, Windows Server 2012
Internet Explorer 11- 64 bit with stable network connection
Processor with clock speed of 2.4 GHz required
Minimum RAM of 2GB required
Free storage space – 2.5 GB
An Optical Drive; 4X DVD-ROM drive for CD installation.
Two extended monitors, screen resolution-1024*768 or above required.
QuickBooks Desktop 2014 or Earlier
From the QuickBooks version 2015 and later, all are compatible with Windows 10 Operating System. QuickBooks version before 2014 are not able to work with the Windows because the software features would not align with the Operating system. So, it is recommended by professionals and experts to always update QuickBooks to latest versions 2015 and later.
Differences between QuickBooks Software Versions (2015 and 2016)
Inuit keeps updating its products, especially QuickBooks, known for its distinct performance in Business Bookkeeping and accounting for all type of entrepreneurs. But some users who want to update their QuickBooks 2015 to version 2016 and are bit anxious about it. Look at the table below making comparison of the features of QuickBooks versions 2015 and 2016:
Features
QuickBooks 2015
QuickBooks 2016
Reporting
Does not support advanced reporting
Support advanced reporting
Update Company File
Provides feature to update company file to new version
Provides feature to update company file for new version
Bill Tracker
Not supported in QuickBooks 2015 Pro, premium and Enterprise
It has the feature of Bill tracker.
Supports Bulk Clear Send Forms
It does not have bulk clear send forms.
It supports bulk clear send forms.
Ways to Enable .NET Framework 3.5 (QuickBooks 2015)
With the .NET Framework 3.5, you can make QuickBooks 2015 compatible with Window 10 Operating System. Its is essential because if you try to access QuickBooks 2015 without the Framework, it will not execute successfully.
.NET Framework is by default turned off by Microsoft, and you can experience the functionality of OS. Inspite of QuickBooks 2015 can be used with Windows 10, it may not function properly. So, it is suggested that to enable before using QuickBooks. Follow the steps to enable:
Go to Start menu > press Windows + R.
A Run window will open. Type their Control Panel and click OK button.
Select Uninstall a Program from list options.
Next go to Turn Windows features ON or OFF option.
A dialogue box open showing .NET Framework 3.5 and .NET Framework 4.5.
See if the option is turned ON. After this, restart your PC and run QuickBooks.
Ways to make QuickBooks Desktop Compatible with Windows 10
To make QuickBooks compatible with Windows 10 ensure .NET Framework is ON, follow the steps below:
Click on Start Button > click on Turn Windows features- ON or OFF.
A dialog box opens and see the option for .NET Framework 3.5 and the .NET Framework 4.5.
Check if .NET Framework is ON, if not, then click on checkbox to enable it.
Finally save and finish the task.
Conclusion
From the following article, we conclude the knowledge of QuickBooks version compatibility with Windows 10. It is a complete guide which tells about the different versions of QuickBooks which can work with Windows 10, what all is required to install and download a specific QuickBooks version on your Desktop.
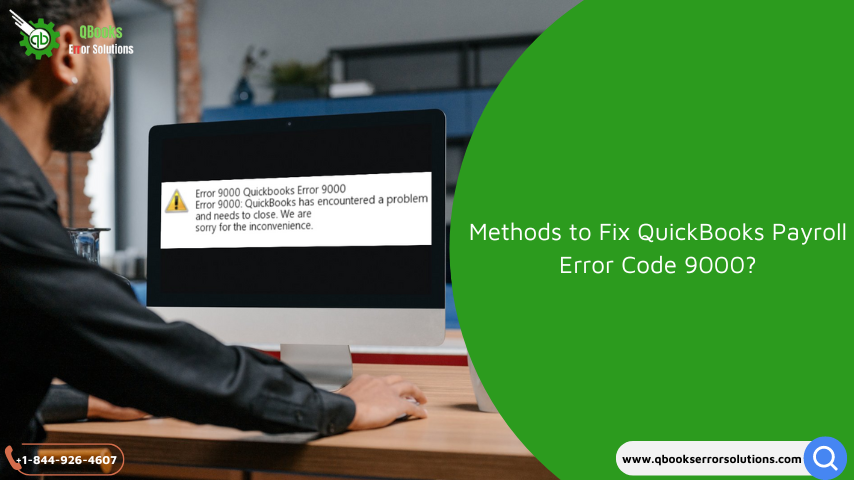
The article highlights the ways for debugging Error 9000 which is a QuickBooks Payroll Error. The QuickBooks Payroll Error 9000 depicts that you are not able to send the Payroll information or try to make a deposit through checks in their respective accounts. This is because you are not able to connect or retrieve information from QuickBooks server database, where all the information has been stored of respective QuickBooks’ user account.
Normally, this occurs due to poor networking with QuickBooks desktop or Online to another system server. This will obstruct you to proceed further and delays your work as the error message ‘ Error 9000 QuickBooks has encountered a problem and needs to close.’ This technical glitch will refrain you from performing other tasks too.
Symptoms when you will face the QuickBooks Error 9000 in your system:
System will be experiencing crashing, freezing and performance will be sluggish.
Frequent display of error messages
Task disruption
Tax tables won’t get updates.
Refrained from QuickBooks services like upgradation, validation of data and transactions.
Requested files won’t get fetched.
Delays in clients or employees’ payment
Further in the article you will come across reasons behind QuickBooks Payroll Error 9000 and 10 best debugging solutions to overcome the issue. But before you troubleshoot, check the following things, for no trouble is faced by the user while executing them. Such as:
Maintain backup for avoiding loss of data.
Keep your Windows Drivers updated.
Check recent version and updates of QuickBooks are installed.
Confirm is the router is connected for internet connection, else troubleshoot from Network and Sharing center in Control Panel.
What are the Causes of QuickBooks Payroll Error 9000
To resolve the QuickBooks Error code 9000, you need to follow the procedures to ensure that your SSL setting of your system are changed so that you can send and receive your payroll and funds transfer to accounts. You must follow each step so that the issue of Error code 9000 gets resolved with the change in browser settings. These steps will help you to make QuickBooks compatible. The steps are:
First check if the browser you are using is the default opening browser of your computer system.
Now the next step is to click on Tool > select the Internet options to look for Connection tab where you can alter your LAN settings.
Just see where Automated Detected Settings is, ensure that your proxy server field is empty.
Check SSL 2.0 and SSL 3.0 are marked as ticked. Keep the TSL 1.2 null.
To resolve the problem of QuickBooks Payroll Error 9000, it is better to know the root cause behind the disruption. This will help to analyze and debug the problem. Here are the following causes:
Outdated QuickBooks
The expired version of QuickBooks or subscription plan is finished. Also, when your QuickBooks features and services are not updated.
Connectivity Issue
Bad internet connection due to router settings, LAN connectivity problem, low uploading per Mbps or network settings.
Network Layer settings are Incorrect
When your Secure Sockets Layer(SSL) or Transport Layer Security(TSL), which are encrypted protocols which protect data transfer over internet, settings are not correct.
Company files issue
When the company files are corrupted or damaged of QuickBooks.
Other software settings or viruses issues
Due to security software like antivirus and firewalls can disrupt the sending of payroll and create QuickBooks Payroll Error 9000. Also, because of some viruses like malware or worms can hamper the functioning of QuickBooks unable to fetch the request sent.
May be the setup issue is prevailing, which is causing Error 9000.
The applications are not compatible with the system, there may be conflicting software.
Your system date and time does not coincide with the current date and time.
10 Debugging Methods For QuickBooks Payroll Error 9000
To debug or fix the QuickBooks Payroll Error 9000, let us follow the 10 essential methods to eliminate the problem of inconvenience in sending payroll or direct deposits checks to the user and employees, resulting in delay of work and data cannot be validated. The following 10 steps involved are:
Method 1: Correct the Security Socket Layer Settings(SSL) of your system
To resolve the QuickBooks Error code 9000, you need to follow the procedures to ensure that your SSL setting of your system are changed so that you can send and receive your payroll and funds transfer to accounts. You must follow each step so that the issue of Error code 9000 gets resolved with the change in browser settings. These steps will help you to make QuickBooks compatible. The steps are:
First check if the browser you are using is the default opening browser of your computer system.
Now the next step is to click on Tool > select the Internet options to look for Connection tab where you can alter your LAN settings.
Just see where Automated Detected Settings is, ensure that your proxy server field is empty.
Check SSL 2.0 and SSL 3.0 are marked as ticked. Keep the TSL 1.2 null.
Method 2: Configure your firewall settings
Firewall settings, due to security reasons, block your QuickBooks to get updates or access the server. Alteration in the setting can fix the error which is causing issues in the functionality of QuickBooks and interrupting system performance.
To resolve this QuickBooks Payroll Error 9000, follow the steps:
Under the Window Firewall program, open from the start menu, head to the Advanced Settings.
Next step for the user is to right click the Inbound Rules, under advanced settings and then click on QuickBooks option and hit Next.
Under the Program Path option, from the different file names select the heads ‘qbw32.exe’ and ‘qbupdate.exe’, see if the permissions are allowed to them.
Finally, you must hit Next, then click on Allow Action Button. Wait for completion of the process.
Method 3: Download and Utilize QuickBooks Tool Hub
The QuickBooks Tool Hub is an important tool which contains the error fixings options like Install Diagnostic Tool, QuickBooks File Doctor, Quick Fix My Program Tool, etc. to fix the errors related to QuickBooks. Though QuickBooks Tool Hub is compatible with QuickBooks desktop version of 2016 of Windows, not QuickBooks Online. Follow the required procedures, for fixation of the QuickBooks Payroll Error 9000:
Login into your QuickBooks Desktop and then head towards the file menu.
Move to the Utilities option where you will file Repair file and sub option as Network Problems options.
From there you can access company files of your QuickBooks.
Under the Advanced settings section select Error Code 9000 to fix from the drop-down menu.
Now re-login QuickBooks with your user account, then again try to send the payroll and direct transfers on arrival of checks.
Method 4: Remove junk files from the system
Junk files are hex for the computer systems as they occupy unnecessary storage space and lead to frequent disruptions in the functioning. It also may be the cause of QuickBooks Error 9000. Let us remove theses files to ensure that the error gets eliminated:
The first step to remove junk files is to go to Start > then type cmd or simply type ‘command prompt’.
Press the keys together Ctrl+Shift, tap enter key on keyboard.
When your screen displays Permission Dialogue Box, press on YES. This will initiate disk cleanup task, where you can select by yourself the files you want to remove.
Hit the finish button, then OK.
Method 5: Modify system Date and Time
For the smooth functioning, one should ensure that the computers date and time coincide with the software server on other computers. This will avoid QuickBooks Payroll Error 9000. Follow the steps to change date and time of the system:
From Window Taskbar, choose Date and Time Settings, where you will see a window oopen up displaying time(hh:mm:ss), date(dd) and year(yyyy). Modify the date and time accordingly.
Now restart the PC to see if the Error code 9000 is resolved.
Method 6: Cancellation of Publishers Certificate of Invalid Version
Sometimes when the user is using the unauthorized version of QuickBooks, it is important for ‘Revocation of Publishers Certificate’ means one needs to cancel the invalid subscription. To do the following, perform the steps:
When you open your browser, tap on the Tools menu > go to Internet option from the list and then select Advanced option.
From the Security head under Advanced option, unmark the ‘Publisher Certification Revocation Box’.
Then you should try to reboot the PC, now reopen QuickBooks.
Method 7: Try to Restore your System
To restore your system, follow the steps:
Under the Control Panel, you must search for System Restore section, where you first need to click on it and then you have to fill out the Admin Credentials to restore your system.
You have to find a Restore point, after that click on Next button, this will start restoration process.
Follow the upcoming instructions given in the Restoration Process wizard one-by-one, then you have completed the process by clicking on the finish button.
Method 8: Take help of Clean Install Tool
QuickBooks provides a tool which is used to resolve the problems occurring while you are installing updates in your QuickBooks. This tool is known as Clean Install Tool, which helps in debugging errors caused while installing QuickBooks and their updates. We will use this tool to debug QuickBooks Payroll Error 9000. The steps to use Clean Install Tool are:
From the Inuit website of QuickBooks, download and install Clean Install Tool.
After storing it in a specific location, access .exe file of the Clean Install Tool and follow the procedure for installation.
Some wizards or dialog boxes get open, proceed with them.
After finishing use the tool to remove Payroll error 9000.
Method 9: Flush DNS
Due to system updating activities, there are some files which are generated by other programs while they get updated from online itself. They take up storage and also conflict in the path of QuickBooks upgradations and send requests to fetch payroll files and deposit the amount in the particular accounts. For this you need to delete DNS from the system. To do so, follow steps:
From the start menu you need to type ‘Command prompt’ in the search field.
Now in the command prompt window, where you can see the insert symbol, type the following ‘ipconsigns/flushdns’ and you need to press Enter key.
Let the process take place to remove/flush dns.
Method 10: Upgrade Recent Tax Tables of QuickBooks Payroll
To upload latest tax tables in your QuickBooks system to resist Error code 9000, follow the steps:
While you open your QuickBooks Desktop, the user need to head towards the Employee Section.
From there you will get Payroll Update option, then you need to download it.
The user needs to download the recent updates from there.
When this is done, information will be displayed for completion.
The head ‘State Unemployment Insurance Rate’ needed to be validated manually by the user itself.
Now complete the configuration of ‘New State Taxes’ and now task is completed.
Conclusion
The purpose of the article is to resolve QuickBooks Payroll Error 9000, which an error caused by bad connectivity and file fetch requests for accessing payroll and transfer funds to the accounts are restricted. Here server fails to connect. The article talks about symptoms, causes and methods to resolve QuickBooks Payroll Error 9000.
Sometimes the company’s preferring to use older versions of QuickBooks for their account managing services required as per preferences. So, for the users who want to downgrade QuickBooks file to an older version from the currently they are working in, here’s a quick guide. There will be no modifications and damage to your company files and data stored when you covert QuickBooks file to an older version.
How can you use the data of latest version in old version?
Though we cannot convert the file of QuickBooks latest edition to the older version format. But we can create a backup file to access the data.
If you are using a particular latest version company file for instance, QuickBooks 2018, so you need your backup file to be of same 2018 version.
While you are opening the backup file in the old version, save it in another name and relocate it.
QuickBooks Subscription Plan to Demote from Latest Version
By mistake, if you have taken the costlier version of QuickBooks whose features are not compatible with your current managing system then QuickBooks provides a subscription plan to change back to the older version. The user requires to take in following considerations:
Failure in connectivity with other programs and applications.
Failure in ‘Recurring Transactions’
Deprive from discount availed with QuickBooks subscription.
Deprived from the user support services
Failure in inventory management
Failure in multi-currency function
Conversion process to downgrade QuickBooks file to an older version
Here are the steps given to demote your QuickBooks:
Ensure while you are upgrading or downgrading, your internet connectivity and speed is stable for no error occurrence. Now move to Accounts and Section field under Setting head.
Check if your accounting information is recently validated, now head towards the option of Billing & Subscription. From there you choose Downgrade, then tap on the button Proceed.
Next step in the process is to click on New Plan. Now see the things which will be removed while demotion/ downgrading.
When everything is done, hit on Change Plan.
Losing the QuickBooks User Support
As the QuickBooks provides support to it users of different versions, you need to see if while downgrading you are an abled user and doesn’t lose support services of QuickBooks.
The 2019 customer support eligible users are:
An Invoiceable user with two firms of accounting.
Two accountable firms with three Invoiceable users sharing QuickBooks Essential.
QuickBooks Plus which are shared by 5 Invoiceable users with two accounting firms.
QuickBooks advanced shared by 25 Invoiceable users and 3 firms.
Note– Remember to delete users from the plan you are Downgrading your QuickBooks.
Loss of features while you are Downgrading QuickBooks
Features lost while QuickBooks downgradation are:
Recurring Billing and Payments Transactions
Before Downgrading, the user needs to off or halt the settings of Recurring Transaction templates. In the QuickBooks Online Simple Start, recurring transactions are not there, otherwise, you must track the proceedings related to payments and invoices by yourself.
Third-Party Applications
While you are demoting your QB desktop, check from the head of My Apps, what all applications and programs are connected to your QuickBooks, which may be get affected.
Multi-Currency
QuickBooks Online Simple Start does not assist multi-currency function, if you are downgrading the latest version of QuickBooks Desktop to QuickBooks Online Simple Start. It will restrict the following process to take place.
Inventory Tracking feature
Only the QuickBooks versions Advanced and Online Plus has the feature of the Inventory tracking, so when you are downgrade, you need to halt that feature as older version cannot support it.
Downgrade QuickBooks Subscription
To downgrade your subscription of QuickBooks:
Login as authentic user in the QB Online. When logged in, under the Settings sections you have to move to Account and Settings options.
Next move is towards the head in QuickBooks window Billing and Subscription, be sure to make payments timely.
The user now must select the option of Downgrade and make choice for the subscription plan you want.
Carefully examine and make contrasts of versions and the features which may be compatible for your system.
To modify, features like Turning Off Recurring Transactions, follow required instructions on screen.
Hit on Change Plan for completion. If still want to switch to other previous versions, wait for 24 hours for Downgrade option to get.
Procedure to Convert QuickBooks File to an Older Version
Follow steps to downgrade:
Be sure you are the administrator, login and click on File > then select the option of Open or Restore Company.
The next step is to choose Open a Company File, then hit on the button Next.
When dialog box gets opened search for expired company files and double click on them. You will get some details. A prompt appears stating ‘change in file will make it incompatible with old versions, mark the checkbox below.
After this, the next step is to hit the click on Update Now, it will ask for Backup options, follow required instructions.
At last, hit yes.
Comprehensive Process on Downgrading QuickBooks Desktop
Downgrading QuickBooks is done mainly because of cost and convenience factors. Process for the following is:
Get started with QuickBooks, login with credentials and move to the file menu.
Now the very next step is to hit Switch to Single-user Mode. Again, head towards file menu and choose Backup Company from the list of options.
To create a backup file, select the option of Create Local Backup and then tap on Next button on the screen.
Windows pops up where you need to click on Local Backup head and again click on Next button to proceed.
A Local Backup Only is shown on the screen on browse to save the file on a particular folder or place.
Run a speedy security scan, then ok.
Final steps are hit on Save it now, then Next. A message of completion gets displayed.
Restoring company files backup
The user must first, restore file from local backup, select Restore the Company under menu bar.
You must save a backup copy, then hit on Restore a Backup copy option.
Hit Next.
Process 2: Demote your QuickBooks
From the Inuit site, move to Help section.
The very next step is tap on Manage my License.
Tap on to Switch to tab, where you need to select your version of QuickBooks.
Enter License and product number, and other credentials, then click on Ok.
Downgrading process will be initiated.
Process 3: Change from QuickBooks Desktop to QuickBooks Online
First download and install the new QuickBooks from Inuit website. After that you have to create company file backup and remove unnecessary data.
After you have sign in with your registered credentials and product & license number, head towards Company tab > choose the option Export Company File to QuickBooks Online.
After you have proceeded with Start your Export, visit QuickBooks website again.
Enter as Admin from Chose Online Company, select any company.
Continue and write “Agree”.
Tap on to replace button now, hit on “ yes go ahead and replace the data”.
Finally tap on Replace Again and let the process complete.
Conclusion
The article finally ends with the complete guide on how you can convert or downgrade QuickBooks file to an older version. Also, it tells how you can switch from desktop to QuickBooks Online mode.
QuickBooks Time can be effective for improving the business performance in issues related to the employees, assignments, productivity, payroll, and billing. However, facing login problems will pose a lot of inconveniences in management and undertaking of activities as well. In this blog, I am going to discuss few most often seen factors that lead to QuickBooks Time login issues so that you can easily get rid of all these issues.
Causes of QuickBooks Time Login Issues
1. Poor Internet Connectivity
Some of the issues could be related to login for QuickBooks Time therefore it is recommended that internet connection should be stable.
2. Browser Settings
Contaminated cookies as well as different configurations of the browser may lead to the problem with login. Chrome settings can be changed, browser can be refreshed and cookies deleted in order to increase QuickBooks Time’s compatibility.
3. Incorrect Login Credentials
Users also often encounter problems specifically in the login process attributable to wrong entries for the username as well as the password. It is crucial to check and use the right credentials particularizes so that you do not end up with several log in issues.
Incorporate the right login details or if this information is forgotten the system provides options for the user to reset the information to gain access.
2. Clear Browser Cache and Cookies
To avoid some problems with logging in follow such steps as clearing browsing data in Chrome, for example, the cache and cookies.
3. Check Internet Connection
Ensure internet connection before getting to the QuickBooks Time login, and if there is an issue related to it face it head on.
4. Log in with Incognito Mode
The cache and cookies-related login issue may be resolved by enabling the private browsing mode or Incognito mode.
5. Access Official QuickBooks Time Website
Access through the official site, tsheets.com Also, ensure you login to the official site of the software to have the best account. intuit. com, to avoid problems of log in and to ensure that the clients easily and freely access the QuickBooks Time.
Integrating QuickBooks Time with QuickBooks Online:
QuickBooks Time allows for a smooth integration with QuickBooks Online to improve features such as time tracking and billing, meeting scheduling, and more. Follow these steps for successful integration:
Perform a search of ‘Apps’ in QuickBooks Online in the search bar for ‘QuickBooks Time’ and click on ‘Get App Now. ’
Time tracking preferences can be set by going to the ‘Gear Icon,’ ‘Account and Settings’ where time related settings are found.
Making this possible, once the preferences have been set in QuickBooks Online, choose ‘Launch QuickBooks Time. ’
By dealing with causes of QuickBooks Time login issues and applying recommended solutions, the users can upgrade the experience when using this system, accelerate their productivity, and keep good records on time.
In case of any questions regarding the QuickBooks Time login or for any additional information, users can inquire 24/7 by dialing +1-844-926-4607.
Learn the procedure to open .QBM Files in QuickBooks
In terms of accounting software, QuickBooks has proven its place among entrepreneurs and businesses, where managing data and keeping transactional records are an important aspect. Due to QuickBooks business operations can be implemented in ease with maintenance of company’s database includes sales order, purchases, client’s information, payment details, bills etc. Sometimes the information is stored in QuickBooks .QBM files. It does not open in one click.
QBM file refers to file which contain all data stored on the QuickBooks. The data is stored in compressed form as backup (.QBB-QuickBooks Backup files). It is very useful in terms of data loss, where due to its compressed form you can share the .QBM file across the network via Emails. The blog is about the ways to open .QBM file in QuickBooks by the user. It gives detailed steps to follow to open. QBM.
Ways to Open .QBM Files on different Operating Systems
Let us look at some procedure or approaches for opening .QBM files on different type of desktops such as QuickBooks, Windows and Mac:
Approach for QuickBooks Desktop
Open QuickBooks desktop.
At the top left side, click File option and then select Open or Restore Company.
Follow the below instructions to open .QBM file for windows.
Download and install QuickBooks Pro on your windows desktop.
From download folder, find the .QBM file you want to open.
Right click on the file, select open with, then click on ‘Intuit QuickBooks Pro’.
Click on OK, file gets open.
Approach for Mac
Download and install QuickBooks Pro on your MacBook.
From download folder, find the .QBM file you want to open.
Right click on the file, select open with, then click on ‘Intuit QuickBooks Pro for Mac’.
Click on the OK button when the task is completed.
Procedure for Importing .QBM File
Here are some procedures to import QuickBooks .QBM file:
Click on Company menu > select ‘Export Company File to QuickBooks Online’.
With your username and password, login as QuickBooks user or signup.
Select a file to import.
Click on Continue option > hit on OK button > then click on ‘Got it’.
After completion of the task, a confirmation mail is sent to your registered email.
Conclusion!
.QBM file being a crucial part of QuickBooks as it stores the all data, is an essential in the times of data loss. In order to retrieve data, it is important to know how you can open these files in different versions of Operating system like Mac, Windows and QuickBooks Desktop. Also, the blog tells us about importing the .QBM file. For further information visit our website qbookserrorsolutions.com or call us at +1-844-926-4607.
QuickBooks is a popular accounting software with distinct features to handle and perform certain required calculations on company data and keep track record of incoming and outgoing transactions, i.e., Cash flow. Sometimes due to unexpected problems, the QuickBooks software goes into situations where the system asks to reboot your personal computer again and again. Due to this problem, QuickBooks is restricted from installation and updating the latest versions or features. Also, many tasks are left pending due to the continuous occurrence and time consumption because of the error message ‘QuickBooks Requires that you Reboot Loop Error‘. This problem is most common in QuickBooks 2023.
The article gives an overview of the QuickBooks Reboot Loop Error, where the system is forced to reboot the system repeatedly. Also, we will come across causes and solutions to the problem that occurred. The user is advised to follow the steps carefully and check all instructions.
Reasons for QuickBooks Requires that you Reboot Loop Error
The Reboot Loop Error pops up in QuickBooks when you try to use the software. Error obstructs you to work on QuickBooks which leads to delays, transactions can be recorded, loss of data and there are changes that the files get damaged. Let’s quickly look at the causes which have caused this error:
1: User Account Problems
The error occurs when Windows has not allowed all permissions to user accounts. This hampers QuickBooks to function properly.
2: Corrupted or Damaged Company File
The company file you are trying to access is corrupted or damaged, then the loop error related to ‘QuickBooks Requires that you Reboot’ occurs. That’s why it is always recommended to scan the company files and repair them if damaged.
3: Another Software is Restricting
Sometimes we have some software in our PC systems that obstructs the path of installation of the QuickBooks software. QuickBooks is not able to perform properly resulting in this error.
4: Corrupted Version of QuickBooks installation
The user has may downloaded the corrupted version of QuickBooks from an unofficial website and that has put the QuickBooks in the Reboot Loop Error.
5: Old Version of QuickBooks
The user might have not updated the latest version of QuickBooks and is using the old version of it. Due to the expired version, the ‘QuickBooks Requires that you Reboot’ issue pops up.
Click on Update Now and proceed according to the instructions appearing on the screen of QuickBooks to update.
Method 2: Try Rebooting the Computer System
Sometimes you need to reboot your PC, where you want to install QuickBooks. The user needs to stop all the ongoing tasks and programs and reboot the computer system.
Method 3: Use Install Diagnostic Tool to fix Reboot Loop Error
You need to Download and Install the QuickBooks Install Diagnostic Tool to fix the ‘QuickBooks Requires that you Reboot Loop Error and follow the essential instructions that displays on your screen to process the repair.
Method 4: Again, download and install QuickBooks
Sometimes the user needs to Delete the current QuickBooks version and download the new one. For this follow the steps:
Go to Control Panel from the start, then uninstall QuickBooks.
From the official Inuit website, download the latest version of QuickBooks.
You need to find the conflicting software that is not allowing QuickBooks to function. For example, software like antivirus software, firewall, Windows Defender wall, etc are obstructing the path and leads QuickBooks to reboot repeatedly.
Method 6: Restore and fix Company files
Open QuickBooks> file menu.
Click on Utilities > select ‘Verify Data’ or ‘ Rebuild Data’, whatever the case maybe.
Follow the steps for the selected option appearing on the computer screen.
When your user account is not valid or does not contain full permissions to access the QuickBooks or the account is outdated, then also QuickBooks Reboot Loop Error occurs on the screen. To avoid this, try to make a new account in Windows and check if the issue gets fixed.
Method 8: Implement QuickBooks in Selective Startup Mode
Sometimes when some other program is running it may disrupt the QuickBooks operations to be implemented. We can use Selective Startup mode for this purpose, here are some steps:
Press Windows+R. It will open the Run window.
Type in the window msconfig.
Click OK to open the System Configuration Window.
Go to General tab > Selective Startup mode option.
Click on Disable all and uncheck the ‘hide all Microsoft Services’ option.
Select the Windows Installer checkbox from the services.
Click the OK button.
At last, restart and reboot the system. Try to open QuickBooks and install the update, when done switch back to Normal mode.
To switch back to normal mode:
Press Windows+R. It will open the Run window.
Type in the window msconfig and open System Configuration.
From the General tab, select normal startup mode.
Click on the OK button and click on restart to reboot your PC.
ND(Network Data) and TLG(Transaction Log) files are the essential components required to run the QuickBooks application. The user needs to check if the files are corrupted or damaged. If they are ‘QuickBooks Requires that you Reboot’ a Loop Error occurs. The solution to fix the files is to rename them using .old at the end of the file names. It will recreate the ND and TLG files. Make sure the newly recreated files are only being accessed then the damaged ones, while you are installing QuickBooks.
Method 12: Modify Temporary Folder Permissions
When the file permissions while performing an update are limited, then also QuickBooks Requires that you Reboot Loop error occurs. To resolve this, follow the steps:
Press the Windows key and type ‘%temp%’ in the search box.
When the temp folder opens, right-click and select properties from the drop-down menu.
Under Windows Username, click on the checkbox for full access. Click on the allow button.
When the next prompt pops, twice click on the OK button.
After completing, install QuickBooks, run, and check if the issue occurs again.
Conclusion!
The article provides us the information regarding how you can Fix QuickBooks Requires that you Reboot Loop error. We also came across the causes which are responsible for this error such as corrupted files, outdated versions, problems with Windows accounts, etc. Also, we get to know the solution for the problem such as repairing files, renaming them, updating, etc. The user reading this manual can get to know about this Reboot Loop error.
If still you are not able to resolve this Error, then you may seek QuickBooks support advice. You can contact me through helpline number +1-844-926-4607.