A Comprehensive Guide for Fixing QuickBooks Error 403

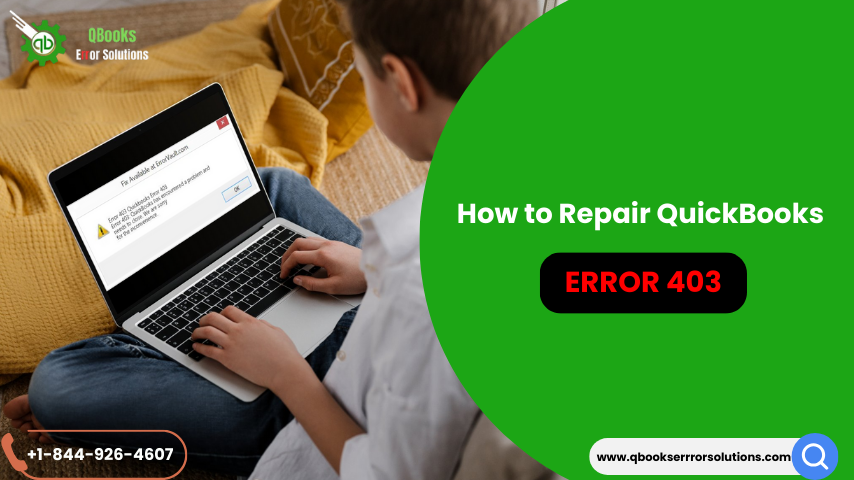
How to Troubleshoot QuickBooks Error Code 403?

Errors are common conflicts that arose out of some technical malfunctions. In QuickBooks, these pesky error codes are a chaos as it offends the functioning of powerful accounting tool and delays in the workflow of businesses. Though QuickBooks is the NO.1 choice for the firms to handle the accounting data and transactions, suitable for any business size. But while executing some actions, the performance is hindered by the Error codes which is probably because of problems related to installations, payrolls, updation, files, connectivity and much more. In this blog we are going to discuss one such issue, i.e., QuickBooks Error 403 which is a Payroll Update Error.

It is generated when you are refraining from accessing online services of QuickBooks. In this case, access is forbidden or denied because of inappropriate LAN settings which allow web program to use proxy server. The glitch may eventuate when the web address requires net access for implementation.

QuickBooks-error-code-403

The motif of the blog is to cover the aspects of QuickBooks Error 403 with symptoms, causes and plan of actions which can be brought into action by the QuickBooks users. Its important to resolve this finance related error as transactions and actual calculations related to accounts get fallacious resulting in  delayed workflow and inaccuracies. The user must read the article to get acquainted with the error 403 and can resolve. Also, we are present here to tackle the difficult on live chat or helpline number around the clock to resolve the errors.

QuickBooks Error 403 Symptoms

Let’s get familiar with the symptoms which will help you know about the Error 403:

  • You will face the alert message “Error 403: Access Forbidden or Access Denied” indication of the issue has triggered you QuickBooks program.
  • Your computer system freezes frequently, and it works sluggishly.
  • You might feel mess-up as the QuickBooks hangs or shut down again and again because of program irresponsiveness.
  • Delay or no updates are installed on your system experiencing error.
  • Records are not maintained due to lack of connectivity.

Factors Liable for QuickBooks Error 403

Here some factors responsible for the cause of Error 403 in QuickBooks which has led to connectivity issues and disruptions in online services:

  • Insufficient permits for accessing website or online platforms in QuickBooks.
  • Obstruction formed by firewalls and antiviruses, which has obstructed the path of accessibility.
  • Inapt internet access configurations.
  • Entrance of malware or virus in your PC has corrupted QuickBooks files and folders.
  • Unaccomplished updates are installed, or invalid installations can be the reason for Error 403.
  • Problems in Windows Registry, while altering changes in QuickBooks software.
  • Damaged CPS file which is payroll tax related file.

QuickBooks Error 403 Troubleshooting Steps

Troubleshoot the Error 403 by going through some potential solutions provided to tackle the issue.

 Solution 1: Resolve with Internet Explorer (IE) browser

  • Go to Internet Explorer > then tap on the Gear icon > from their choose the Internet Options.
  •  Next step in this is to flick on Security tab and adhere the configurations of security settings bar at Medium high.
  • Move on to Advanced tab and head to the Security section.
  • Check the boxes of TLS 1.1 and TLS 1.2 after that Apply and then snap on OK button.
  • Lastly, revisit QuickBooks for updation process and then check for Error 403.

Note: Recently Microsoft uses Edge in place of Internet explorer as its browser, to enable the IE to follow these small steps then you can go for proxy settings in Windows 10.

  • In Microsoft Edge browser go to top right side where the three dots (…) icon is shown.
  • Go through Open menu then choose the Internet explorer from drop down menu.
  • Now follow proxy setting alteration method.

Solution 2: Alter your Proxy Server Configurations of IE

Remember, this solution works with Window 11 or when Internet Explorer is not your default browser, moreover, QuickBooks uses IE as backend for its online services.

  • Initial step to configure proxy server is to first go to Internet Explorer then look over Gear icon present at top-right side of the screen window. For viewing menu bar tap on Alt key.
  • There move to Internet Options then head towards Connections tab.
  • Next check for LAN settings then uncheck the setting of Use a proxy server for your LAN and then hit OK for closing the window.
  • See if the problem of QuickBooks Error 403 is fixed out.

Solution 3: Ensuring the valid Payroll subscription in your system

Follow the instructions below:

  • Restart your PC then visit QuickBooks.
  • Then go through Employees menu > My Payroll Service> Manage service key option.
  • You will be able to view your current Service Name and Status. Make sure its accurate and active.
  • Snap on Edit option and check service key number, replace it with correct service key if not added correctly and hit on NEXT.
  • Unmark Open Payroll Setup from the window and at last hit Finish.

Solution 4: Resort Window Registry issues

  • Primarily, go to start and type in command but don’t press enter key.
  • Just press and hold CTRL+Shift keys and then hit enter to open permission dialog box.
  • In the box, hit yes on the window where cursor is flickering type “ Regedit” and enter to proceed.
  • Pick the Error 403 key for formation of backup in registry editor.
  • From the list choose Save option from list to place the file for QuickBooks backup.
  • When File Name box shows up, type-in “QuickBooks Backup”.
  • From the Export Range box be sure that Selected Branch option is single-out. Lastly, save by pressing the button and save it with .reg extension.
  • Hence you have created the Window Registry backup of QuickBooks.

Solution 5: Perform Disk Cleanup

  • Similarly open the Permission dialog window which gets open up with flickering cursor.
  • Type there “cleanmgr” for disk cleanup task to open up by hitting Ok.
  • The disk cleanup will give you an idea of how much files have occupied your system disk.
  • It will be visible that how much temporary files have covered up your computer space.
  • Pick Files for cleanup then tap on OK.

Conclusion!

Finally, the blog has grasped the potential techniques that how you can resolve the QuickBooks Error 403. This Error obstructs you to make payroll related updates like tax tables which are required by the business so that they can keep an eye on the tax related transactions. It needs to be resolved immediately to refrain any legal or financial issues. We have our technical experts who are well versed in QuickBooks Error related issues and have capability to solve the error codes in less turnaround time. You can talk to us at +1-844-926-4607 for further assistance.

Recommended to read:

How to Troubleshoot QuickBooks Banking Error 179?

How to Resolve QuickBooks Error 3371 Status Code 11118?

How to Rectify QuickBooks Error 6175,0

How to Rectify QuickBooks Error 6175,0?

QuickBooks, no doubt, is a blessing to entrepreneurs in the shape of accounting software. It can deal with business operations and records with improved attributes and more fluent functions. Though, with its excellent performance and most preferred accounting tool, it is also like other software that faces anomalies and intricacies. Irrespective of its expendable expertise in soothing management of heavy accounting data by just a few clicks. One of the common and major problems that is faced by the user in QuickBooks is not being able to open the company files. This creates multi-user mode issues and database server disconnection problems, due to which the user can’t access the files at all. Here, the dilemma that has occurred is QuickBooks Error 6175 0. It shows with a error note, “Error Code: 6175 0 – QuickBooks is trying to display the company files, but the database server is not responding.”

QuickBooks-Error-Code-6175-0

In such a case, the blog for the rectification of Error 6175, 0 gives full detailed information and procedures. If you get stuck with the steps, then don’t be anxious because our technical geeks are here to help you with all possible solutions for your QuickBooks system, which is encountered by issues.

Common Symptoms of QuickBooks Error 6175 0

 Here are some provided symptoms you will face when Error 6175 0 persists:

  • An error dialog box with the code gets displayed.
  • The program won’t respond properly.
  • Inaccessibility of QuickBooks Company files.
  • Connectivity failure to the server.

    Reasons for QuickBooks Error 6175, 0

    These are some proclaimed causes responsible for the pesky Error Code 6175 0:

    • The most admitted cause of the error is the non-accordance of your QuickBooks workstation with the database server system which holds the files.
    • Failure of request and receive protocol while transmitting it through a network because of internet disconnections.
    • Firewall configurations and antivirus block the route of server request access to company files by the user.
    • If multiple users are hosting a common file, it will result in chaos. This is multi-user issue of Error 6175 0.
    • Expired or unaccomplished QuickBooks installations or setup can result in connection failure to QuickBooks Database Server Manager and restrict company file fetch process.
    • Also, if the hosting server is busy then this error problem occurs.
    • The disrupted .ND (Network Descriptor) file also contributes in the occurrence of Error 6175 0.

      Methods for fixing QuickBooks Error 6175, 0

      To eliminate the QuickBooks Error 6175 0 here are some promising methods which will likely help you resolve the issue:

      Approach 1:  Attest and alter host settings

      In this scenario, you must ensure that the host settings of all your QuickBooks program systems should be turned on, except the PC in which your company files reside. So here is a way to alter the settings:

      • To begin with open your QuickBooks program and make a move to File menu > then Utilities under it.
      Naviagate-Utilities-Option-Screenshot.jpg
      • Now your are supposed to attest the host settings if they are turned on.
      • In the provided list, if you get to spot Host Multi-User Access, it is an indication of the host setting is active. Else, not then you are required to switch it on and comprehend the prompts avail for turning the host configuration ON.

      Approach 2: Try the tool: QuickBooks Database Server Manager

      The role of Database Server Manager of QuickBooks is to provide a tool for fixing out the disrupted network files which are hinderance for QuickBooks system connectivity issue.

      Resolve company file not accessible Error 6175 0 by following these measures:

      • Head to task bar at  the bottom for start menu and search for QuickBooks Database Server Manager.
      QuickBooks-database-server-manager-Start-Scan
      • When you opened the tool go to Scan Folders provided there.
      • Direct the destination where the .qbw company files are placed in the system and then snap on OK button.
      • Let the Scanning take place and after completion, exit the window of tool.

      If in case the QuickBooks Database Server Manager is not working, the user is required to restart it: –

      • Launch the run window either using WIN+R keys or start menu search where you type the instruction “services.msc” & tap enter for opening the window.
      • Under this window, right-tap on QuickBooksDBXX, here XX depicts year of the QuickBooks version such as QuickBooksDB22) and restart the Database Server Manager.

      Approach 3: Utilization of UNC Path as an alternative for Mapped Drive

      UNC (Universal Naming Convention) path is a method for getting in to network folder, .ND files, servers, remote printers and other resources across different systems, a standardized naming mechanism for Microsoft Windows. Whereas mapped drives are shortcuts for shred folders, remote systems and servers. Mapped drives can be a root for connection disruptions. Here are measures for switching to UNC path for get in touch with company file.

      • Launch your desktop QuickBooks program where you got to press and grasp the Ctrl Key. Open and Restore Company will be in view.
      • Tap on it and for next process hit the Next button on the screen.
      • Direct the mouse to click on Network > My Network Places availed on the Left side of the window.
      • Look over you .qbw company files and double-tap to access.

      Approach 4:  Ratifying network connection and firewall settings

      One needs to make sure the internet connectivity is strong, and firewall setting are turned off for avoiding QuickBooks Error 6175 0

      • You must attest your internet network that it is consistent and doesn’t obstruct the process of fetching company files.
      • For this check your wired connections, connectors, routers, wi-fi and other peripherals connector hardwires responsible for sustaining internet connectivity.
      • Also assure your system network status from Control Panel or Network and Sharing icon on desktop.

      Firewall configurations:

      • Press windows key for getting in start menu > then Control Panel window, where you will find System and Security.
      • There you need to hit a click on Windows Firewall, where you have to snap on Allow an App or Feature option.
      • Verify that both private and public access is active for QuickBooks desktop program.
      • If you are not getting QuickBooks from the provided list, head to Allow another App and tap on QuickBooks from it.

      Approach 5: Repair Broken files with QuickBooks File Doctor Tool

      QuickBooks File Doctor Tool is provided in the QuickBooks Tool Hub, you need to first install in your system to access. The motive for using this tool is to get fix Error 6175 0 which might be caused by faulty network file:-

      • In the beginning, download QuickBooksToolHub.exe and install it on your PC.
      • After installation, launch and move towards the headings given on left side of the window  where “Company File Issues” tab is provided, hit it.
      • In this you will get “Run QuickBooks File Doctor“, click on this tool option.
      QuickBooks-file-doctor-from-tool-hub-Screenshot-Image.png
      • Execution for fixing faulty files of your QuickBooks folders including network files will be implemented.
      • Wait for completion and then try to check if the .qbw files are accessible now.

      Winding up!

      Here we have delved deep into the procedures to fix QuickBooks Error 6175,0 which is an error related to disrupted server connected and inaccessibility of company files. The blog provides intricate information with approved possible steps which the user can solve this technical glitch. Still, you want help you can consult our dedicated QuickBooks Error support team of professionals who are enthusiast in resolving any issue related to QuickBooks. Also, talk on call at +1844-926-4607 for perfect guidance and full assistance in every step of resolving your QuickBooks problem.

      Read the related articles:

      How To Troubleshoot QuickBooks Payroll Error 9000?

      How to Solve QuickBooks Error Code 7300?

      How to Resolve QuickBooks Error Code1712

      How to Resolve QuickBooks Error Code1712?

      QuickBooks is dominating as an accounting software with its intensive features and capability of handling large amounts of business data, it is popular among entrepreneurs. Being a software program, QuickBooks also prone to errors while performing an operation. When the users are performing an installation or update in QuickBooks, the process gets eliminated. The failure occurs because the folder in which the user is trying to install is corrupted or your operating system is damaged. This is QuickBooks Error Code 1712. The error may also prevail if any system data file is disrupted or there are changes in the settings of QB Desktop with the computer system. This will hinder the updating process, and your business transactions and record-keeping will be affected.

      QuickBooks-Error-Message-1712

      Intuit QuickBooks Desktop Installer’ dialog box appears, which shows the error message “We’re sorry! Something went wrong with your installation. Error Code: 1712”. Here the blog provides you with detailed solutions on how you can fix the QuickBooks Install error Code 1712.

      Symptoms of QuickBooks Error Code 1712

      Here are some signs that will indicate the presence of Error 1712 on your QuickBooks system. These signs will help you recognise the error, allowing you to rectify it accordingly.

      • The QuickBooks Installer Error message “error code 1712” will be displayed on the screen while you are trying to install or update.
      • The computer display will turn into blue.
      • There will be an Input/Output Error.
      • You will face issues while shutting down your PC.
      • The connection request- Http protocol Error will be shown again and again.
      • Your Desktop may not function properly.
      • Freezing of QuickBooks desktop.
      • QuickBooks desktop not properly installed.

      Causes Behind QuickBooks Install Error Code 1712

      Let us give a glance at the root causes which are the hinderance of Error 1712. Some of these are: –

      • Install QuickBooks software again without removing the old version of QB desktop from your system.
      • When your registry is corrupted.
      • System is attacked by some malware.
      • When you have installed the corrupted package of QuickBooks.
      • Change in configuration of QuickBooks which doesn’t align with installation requirements.

      Key Points before Resolution Process of Error 1712

      The points to recall before moving to resolution procedure are as follows:

      • Restart your PC.
      • With the use of Task Manager, close all active QuickBooks processes.
      • Reinstall QB software.

      Fixation Methods for QuickBooks Error Code 1712

      Some of the troubleshooting steps for QuickBooks Install Error Code 1712 are given below:

      Method 1: Terminating processes from task manager

      • Click Processes tab to get a view of processes running in the system background.
      • Check for hidden QuickBooks programs and processes under it.
      • End the ongoing QuickBooks Processes.
      • Restart your computer.

      Method 2: In Registry, track the application information

      Follow the given steps:

      • From the start menu in the task bar, open run window.
      • After that type “Regedit.exe” and tap on OK button.
      • After this add path as: HKEY_CURRENT_USERSSoftwareMicrosoftWindowsCurrentVersionExplorerUSer Shell folders.
      • Under User shell folders, you will find Entry AppData on which you have to click twice.
      • Under Edit String dialog box, replace Original Value with the Local Profile Path.
      • Hit on OK then you need to check if Install Error 1712 is solved.

      Method 3: Resolve with QuickBooks Tools Hub

      QuickBooks Tool Hub is a collection of useful tools and options which are helpful in resolving QuickBooks related errors and technical glitches. We will try to fix Error 1712 with the tool hub:

      Utilize Quick Fix My Program

      • At the very first step, end the processes of QuickBooks software from task manager.
      • After that you are required to download QuickBooksToolHub.exe.
      • Launch your installed QuickBooks Tool Hub.
      • From the tool hub move to Program Problems on the left panel. See the Quick Fix My Program option tool under it. After this, reinstall QuickBooks Desktop.

      Try using Install Diagnostic Tool

      • As we have already installed the QuickBooks Tool Hub, you can utilize Install Diagnostic Tool from this.
      • Now move to the head “Installation Issues” given on left panel.
      • Under Fix My Installation Issues, you must select QuickBooks Install Diagnostic Tool, but first close background programs.
      QuickBooks-Install-Diagnostic-tool
      • After the completion of the process, look for the “I am having problems installing QuickBooks” and now hit a click on OK.
      • At last, reboot the QuickBooks software.

      Resolve with Quick Fix My Program

      • Quick Fix My Program is useful in fixing program errors.
      • Now move towards Program Problems tab.
      • Under Fix My Program, select the Quick Fix My Program tool option.
      quick-fix-my-program-from-tools-hub
      • Let the process begin and after completion reinstall QuickBooks.

      Method 4: Try to Reinstall QB desktop

      Adhere to the instructions:

      • For reinstallation process, download the latest QuickBooks Desktop program from Intuit website.
      • On the site you will see ‘Select your Version’ dialog box under Download QuickBooks Desktop, where you will find three drop-down menus, i.e., Country, Product and Version.
      • After you had made your selections, hit on search button and you get the suitable version to download from submitted details. The QB products will be shown on your screen based on selections.
      • Select the version of product you want to download in QuickBooks. The exe. File of that version will get downloaded on your system.
      • Uninstall the old version of QuickBooks from the computer system after creating backup files.
      • Check for the issue of error 1712, if not resolved then add or create an account of Windows User with Admin authorized rights, and again try reinstalling.

      Method 5: Avail Admin access permissions to QB software

      • The first process in this method is to go to the start menu > open the Control Panel.
      • Now tap on User Accounts and look for the following ‘QBDataServiceUserXX’. In every version the end digits varies, like for QuickBooks 2020, the file name will be QBDataServiceUser30 and for QuickBooks 2019, the name would be QBDataServiceUser29.
      • Select the option for Administrator, which you will find under Change Account type.
      • When you have done with your alterations in Admin Permissions, click on Apply button.
      • Lastly, go for QB Database Server Manager steps, recently using.

      Method 6: Upgrade your Windows

      • To begin the process for Windows update, move to the start menu and then System settings.
      • Under System Settings, you will find Update and Security on which you have to click.
      • Next, click on the tab of Windows Update.
      • By clicking on the option of Check for Updates, you will see if any updates are available.
      • If there is any updation to be done, click on the option Get Update for download and installation.

      Conclusion!

      The user through this guide can take steps to fix QuickBooks Error 1712 and can effectively remove technical issue. However, if you are not able to solve the error, here is our team of QuickBooks error support experts with their intensive knowledge and skills will help you either through our live chat service or contact customer support +1-844-926-4607.

      Recommended to read:

      How to Solve QuickBooks Error Code 7300?

      How To Troubleshoot QuickBooks Payroll Error 9000?

      How to repair Quickbooks Error 6190 and 816

      Comprehensive Guide to Resolving QuickBooks Error 6190 and 816: Step-by-Step Solutions

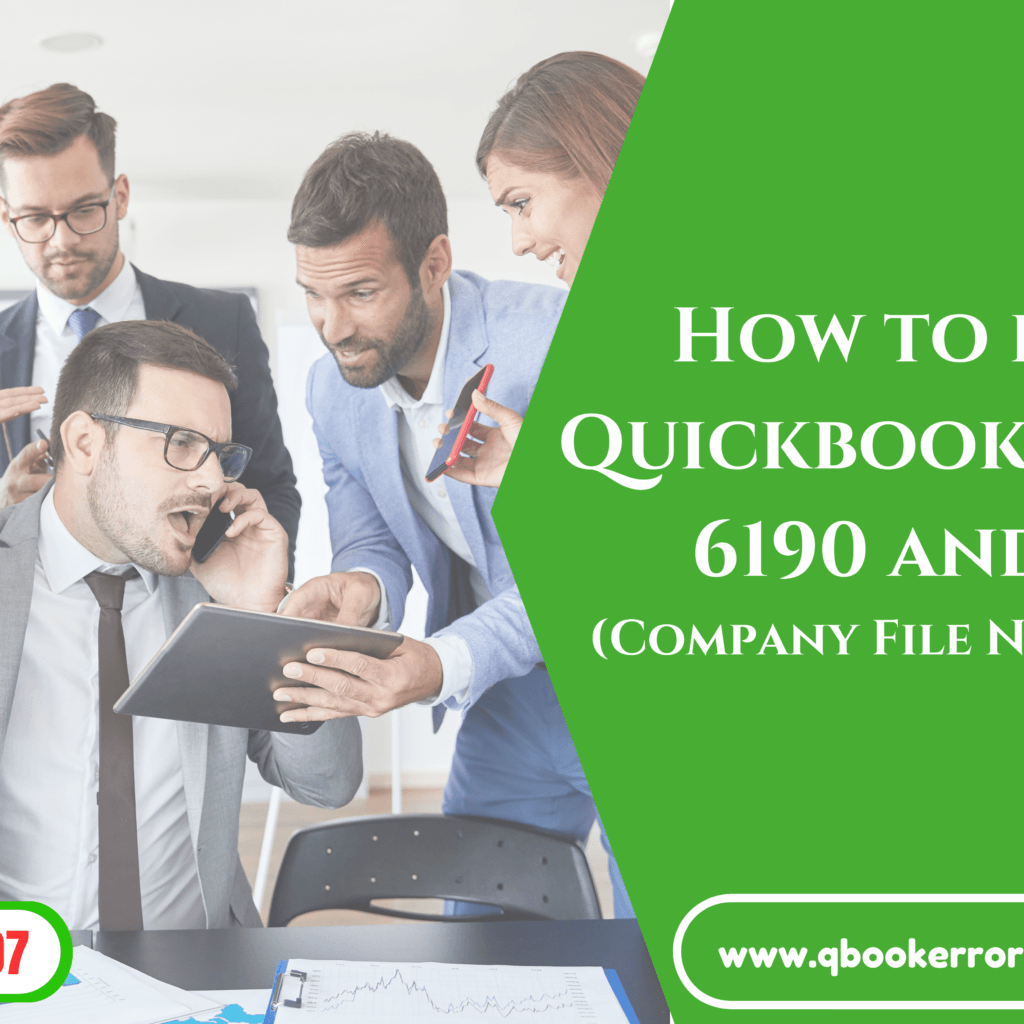
      QuickBooks Error 6190 and 816: How to Resolve These Common Issues

      Encountering errors in QuickBooks Desktop can disrupt your business’s accounting activities. One persistent issue is QuickBooks Error 6190 and 816, which can prevent access to your company file due to file permission conflicts. Understanding these errors and knowing how to resolve them can ensure smooth operation of your QuickBooks software.

      What is QuickBooks Error Code 6190 and 816?

      QuickBooks Error 6190 and 816 typically occurs when users try to access a company file that is already in use by another user in single-user mode. The error message displayed is: “QuickBooks is unable to open the company file. It may have been opened by another user.” This issue is often related to file permission conflicts and requires a transition from single-user mode to multi-user mode to resolve.

      Signs of QuickBooks Error 6190 and 816

      Recognizing the symptoms of QuickBooks Error 6190 and 816 can help you troubleshoot effectively:

      • Error Message: A warning dialog box appears indicating that QuickBooks cannot open the company file.
      • Performance Issues: Unusual glitches or freezing of QuickBooks.
      • File Corruption: Mismatch between the transaction log file (.TLG) and the company file (.QBW).
      • System Lag: Sluggish response times and unresponsive keyboard inputs.

      Common Causes of QuickBooks Error 6190 and 816

      Understanding the causes can help prevent future occurrences:

      • Mode Conflict: Switching from single-user mode to multi-user mode without proper configuration.
      • File Mismatch: Discrepancies between the .QBW and .TLG files.
      • Corrupt Files: A damaged company file.
      • Network Issues: Poor network connections affecting file access.
      • Outdated Software: Using an outdated QuickBooks version.

      How to Resolve QuickBooks Errors 6190 and 816

      1. Use the QuickBooks File Doctor Tool

      • Download and Install: Obtain the QuickBooks Tools Hub from the Intuit website.
      • Run the Tool: Navigate to “Company File Issues” and select the QuickBooks File Doctor Tool.
      • Choose Options: Select either “Both file damage and connectivity” or “Network connectivity only.”
      • Enter Admin Credentials: Follow prompts to detect and fix file damage.

      2. Resolve File Mismatch Issues

      • Open the Company Folder: Locate files with matching names but different extensions.
      • Rename Files: Append .old to the file names (e.g., CompanyFile.qbw.nd.old).
      • Restart QuickBooks: Check if files are accessible.

      3. Verify Single User Mode

      • Restart Your PC: Reboot your system.
      • Move Data: Copy and paste the data file to and from the desktop.
      • Log In: Use admin credentials ensuring no other users are logged in.

      4. Update QuickBooks and Backup Files

      • Update QuickBooks: Go to the Options tab, select “Get Updates,” and reboot your system.
      • Update Backup Files: Ensure all transactions are up-to-date.

      Alternative Methods to Fix QuickBooks Error 6190 and 816

      1. Use QuickBooks Refresher Tool

      • Download and Install: Obtain the QB Refresher Tool from the Intuit site.
      • Run and Diagnose: Let the tool diagnose and fix QuickBooks issues.

      2. Update Windows

      • Check for Updates: Go to Settings > Update and Security > Windows Update.

      3. Fix Windows Registry Files

      • Open Command Prompt: Enter “regedit” and follow instructions to repair registry files.

      4. Delete Temporary Files

      • Use Disk Cleanup: Access Disk Cleanup by typing “cleanmgr” in the run dialog.

      5. Install QuickBooks Database Server Manager

      • Download and Install: Ensure the latest version is installed.

      6. Restore the System

      • Use System Restore Tool: Follow on-screen instructions for system restoration.

      7. Repair QuickBooks Installation

      • Repair Process: Use Control Panel to repair QuickBooks installation.

      8. Use Safe Mode

      • Boot in Safe Mode: Check if external applications are causing conflicts.

      Final Words

      By following these steps, you can effectively resolve QuickBooks Error 6190 and 816. For persistent issues, don’t hesitate to contact QuickBooks support at +1-844-926-4607 for expert assistance.

      How to Fix QuickBooks Error 40003

      How to Fix QuickBooks Error Code 40003?

      QuickBooks payroll updates are essential for state and federal compliance of your business. Nonetheless, it is quite upsetting to get QuickBooks Error 40003 while updating the payroll account information. This mistake can lock out the users from downloading payroll updates, making direct deposits or control the procedures of the payrolls. This guide will focus on explaining why QuickBooks Error 40003 occurs and how it can be solved. 

      What is QuickBooks Error Code 40003? 

      When it comes to QuickBooks Company File, users frequently face QuickBooks Error Code 40003 while trying to open it. This error typically appears with a specific message: The error is displayed as “Error 40003. Unable to access the QuickBooks company file” and it is mainly associated with problems that may arise in the management of QuickBooks database server or network. 

      Causes of QuickBooks Error Code 40003 

      • Damaged or Corrupted Company Files 

      The company files that are used in QuickBooks are very vital for the operations that you intend to undertake. One can experience Error 40003 when files are modified, missing or have been infected by viruses. 

      •  Corrupted Software 

      When a user downloads a CD that is a copy of a genuine software, then the CD is likely to contain virus or bugs which leads to this error. 

      • Wrong QuickBooks Setup 

      It is a fact that their improper setup can lead to operational problems, one of which is QuickBooks Error 40003. 

      • Damaged Internet Connectivity 

      Network issues can negatively affect the updating process of payroll, which culminates in Error 40003. 

      •  Corrupted Installation Files 

      Corrupt installation files that are vital in the running of QuickBooks contribute to the occurrence of this error. 

      •  Outdated Operating System or QuickBooks Version 

      You’re using an older version of your  operating system or, you’re using an older version of QuickBooks Desktop. 

      • Firewall Blockage 

      Another cause is that QuickBooks Desktop software is listed in the block list of the Windows Firewall if it is not excluded properly. 

      Symptoms of QuickBooks Error Code 40003 

      • Payroll Tax Table Update Failure: Therefore, if the payroll tax table cannot be updated, it indicates Error 40003 significantly. 
      • Missing Forms in QuickBooks: This error is also characterized by certain forms not being available in the QuickBooks Desktop. 
      • Direct Deposit Issues: Certain buttons may be disabled and you may not be able to transfer money through such operations such as direct deposits, payroll and many others. 
      • Unresponsive QuickBooks Interface: Common issues that a user will observe are the disconnection of mouse or keyboard, which may lead to making the QuickBooks program unresponsive.

      How to Fix QuickBooks Error Code 40003 

      1: Reactivate Payroll Service Key 

      •  To open the QuickBooks, go to Start-Programs, for keyboard shortcut press Ctrl + K. 
      •  Take the condition of the key for the payroll service. If inactive then write down the primary key of the payroll service. 
      •  Then move to the Edit section of the text and clear out the service key and type it again to recreate it. 
      •  An example is where it will put Next please and one is supposed to click it until it displays Finish and then the click on OK.

       2: Update QuickBooks Desktop Manually

      • Sometimes QuickBooks maybe opened without having a company selected in the ‘No Company’ mode. 
      • After that go to the Help menu and click on Update QuickBooks Desktop. 
      Updating-QuickBooks-Image
      • You will be presented with a new screen
      • Now click on the Update Now button and tick the Reset Update checkbox.
      • Go to get updates and wait until you see a pop up of the installation appearing. Close QuickBooks. 
      • Re-launch QuickBooks and click the Help button.
      • Once you are on the QuickBooks home page, click on QuickBooks Desktop update and then click on the Overview tab. 
      • At the end, select ‘Update Now’ and wait for update.

       3: Configure Internet Explorer Settings 

      •  Ensure that the date and time on the system are proper by synchronizing it with the correct time. 
      •  Update Internet Options settings. 
      •  And ensure that in Internet Explorer encryption is not below 128 bits.

       4: Review Payroll Information of Employees 

      • Open QuickBooks and then sign in.
      • After that click on the employee tab and then the employee center. 
      • Next, select the names of each employee before clicking on Payroll Info. 
      • Ensure Pay Frequency is correctly entered. 
      • Federal Filing Status and Allowance fields, you may need to return to Click Taxes and make any changes that may be necessary. 
      • Click OK twice.

       5: Verify Internet Connection and Firewall Settings 

       Ensure that Internet connectivity is correct and QuickBooks is not being limited by the firewall. 

      6: Validate Date and Time Settings 

      • Begin the menu and the Settings should be the next ones in the list. 
      • First, to set it in motion, you need to click on Time & Language. 
      • Modify the Date and Time if necessary and select the correct Time Zone.

      7: Utilize Verify and Rebuild Utilities 

      • Go to QuickBooks and open it
      • Then go to the File tab and select Utilities. 
      Naviagate-Utilities-Option-Screenshot.jpg
      • After that, select Verify Data and the program will do the process of that function. 
      • If problems are experienced, the users need to select Rebuild Data and then proceeds as per the instructions given on the screen. 

      8: Run QuickBooks as Administrator 

      • Open QuickBooks Desktop
      • Then, right-click on the application from the interface of the desktop and click on the option Run as Administrator. 
      • If appear the Permission screen click Yes. 
      • Repeat the Payroll operations and give update downloads. 

      9: Run QuickBooks Tool Hub 

      • Officially, there is QuickBooks Tool Hub, which should be downloaded and installed depending on the situation with the application. 
      • Next go to the Tool Hub and then click on Program Problems. 
      quick-fix-my-program-from-tools-hub
      • Choose Quick Fix My Program and it will help in scanning and fixing problems. 
      • Close QuickBooks and reopen it again and try to perform the payroll operations.

      10: Use Clean Install QuickBooks Desktop 

      • To remove QuickBooks Desktop, use the Clean Install tool 
      • Install QuickBooks Desktop again by using the standard installation procedure that has been appeared before. 

      Additional Troubleshooting Steps 

      •  If QuickBooks files are damaged, use the system file checker to repair the issue with the components. 
      •  Subsequently, correct the QuickBooks issues that are caused by third-party applications by opening QuickBooks Desktop in selective start up. 
      •  For virus, malware, and other debris removal disk clean up should be used to remove their leftovers and unnecessary files from uninstalled applications.

      Conclusion

      The outlined troubleshooting steps should resolve QuickBooks Error 40003 . If problems persist, contact QuickBooks Error Support team at 1-844-926-4607. They are available 24*7 to solve your queries.

      Related article:

      How to Troubleshoot QuickBooks Banking Error 179?

      How To Create And Open Portable Company File In QuickBooks Desktop?

      How to Troubleshoot QuickBooks Error 6129 101

      How to Troubleshoot QuickBooks Error 6129 101?

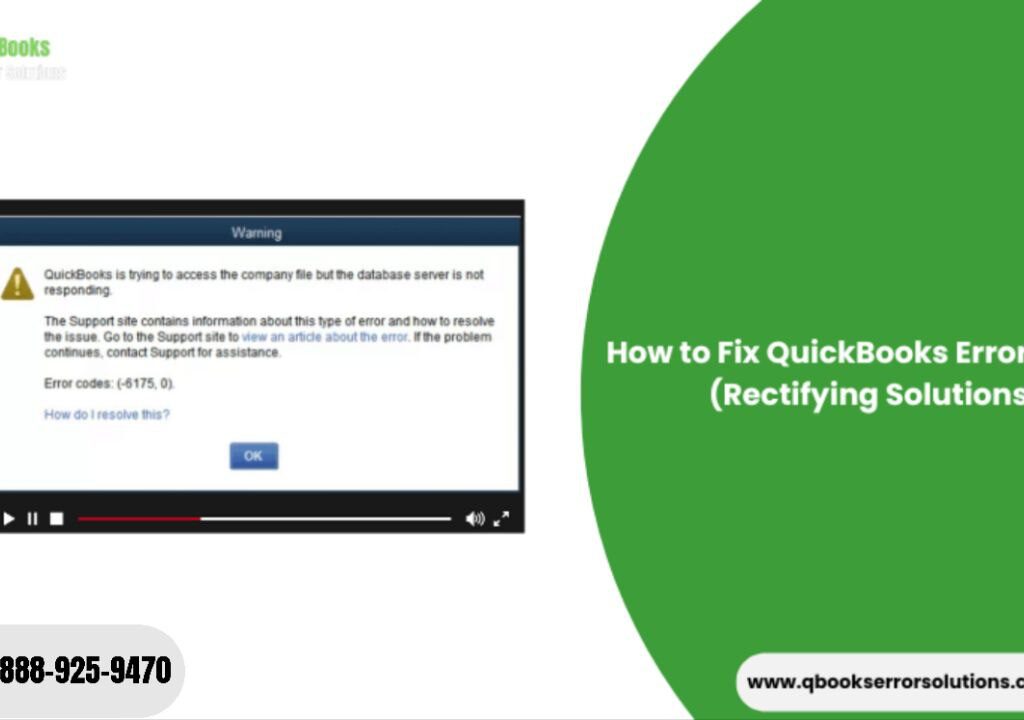
      QuickBooks is a robust accounting software that efficiently stores large company data files on a server, encompassing business transactions, receivables, payables, taxes, and account balances. While this data is typically accessible via QuickBooks prompts and actions, users may occasionally encounter the error message ‘QuickBooks Error 6129 101: Can’t Open Company Files.’ This error arises when there’s a connectivity failure between QuickBooks and the server’s database, preventing access to the company files. Such issues can significantly disrupt business operations, making it essential to understand and resolve them quickly.

      This blog provides comprehensive steps to fix QuickBooks Error 6129 101, part of the 6000 series error codes. Before diving into solutions, it’s crucial to recognize the symptoms and identify the root cause of this database connectivity issue.

      Symptoms of QuickBooks Error 6129 101

      Identifying QuickBooks Error 6129 101 is crucial for resolving issues related to database connection failures in QuickBooks. Here are the common symptoms to watch for:

      • Warning Messages: You receive a warning message each time you attempt to access the database or company files, indicating a data connection failure or inaccessible company files.
      • System Crashes: The system repeatedly crashes when the QuickBooks Error 6129 101 message appears.
      • System Freezes: Your system temporarily freezes for a few minutes when trying to retrieve files from the database.
      • Delayed Input Response: When the error occurs, your mouse and keyboard responses become sluggish, affecting overall system performance.

      Causes of QuickBooks Error 6129 101

      Understanding the causes of QuickBooks Error 6129 101 can help prevent future occurrences and streamline troubleshooting. Here are the primary reasons:

      • Database Server Manager Issues: The error often arises when the Database Server Manager is not functioning correctly.
      • Incorrect Folder Permissions: Inadequate or incorrect folder permissions can trigger this error.
      • Corrupted Files: Corruption in the.TLG (Transaction Log) or.ND (Network Descriptor) files are a common cause.
      • Antivirus and Firewall Interference: Security software like antivirus programs and firewalls may obstruct server connectivity, leading to this error.
      • Power Outages: Unexpected power outages can disrupt the database connection and cause this error.
      • Outdated QuickBooks Version: Running an outdated or unpatched version of QuickBooks can also result in this error.
      • QuickBooks Malfunction: If QuickBooks is not responding properly, it can cause database connection failures.
      • Domain Mismatch: The error is more likely if the client and server domains do not match.
      • Incorrect Windows Entries: Incorrect entries in the Windows registry can also lead to QuickBooks Error 6129 101.
      •  

      Solutions to Fix QuickBooks Error 6129 101

      Solution 1: Update your QuickBooks Desktop to the Latest Version

        • For the updating procedure you are required to open your QuickBooks desktop and go towards the option for Update QuickBooks Desktop.

      Updating-QuickBooks-Image

        • On the right-top corner of the windows you will see an option for Update Now, click on it.

        • After this you have to tick mark Reset Update > hit on the option for  Get Updates.

        • Now after you have completed this procedure for upgrading your QuickBooks, close the program.

      Solution 2: Download the QuickBooks File Doctor Tool

        • Download QuickBooks Tool Hub, as you will find the QuickBooks File Doctor Tool in this hub only, and install the QuickBooksToolsHub.exe file on your system.

        • Follow the ongoing process of QuickBooks Tool Hub installation and press the yes button on the dialog box when asked for changes in your PC.

        • In the upcoming installation wizard, click the Next buttons and also agree on the Terms and Conditions for installation.

        • When the process is completed, then you open Tool Hub and head to the left panel clicking on Company File Issues, there you will find QuickBooks File Doctor Tool.

        • At the end you need to hit click on it.

      Solution 3: Rename.TLG and . ND file

      Rename-the-.TLG-and.ND-files-Screenshot

        • The transaction log files (.TLG) & Network Descriptor files(.ND) are essential as they help in implementing company files of QuickBooks in both multi-user and network modes. By chance, if both the files get corrupted and damaged in that case, we need to change the names of them.

        • Head to the path: C:\Users\Public\Documents\Intuit\QuickBooks\CompanyFile, for using company files.

        • See for the files with extensions.TLG and . ND.

        • Right-click on the drop menu and select the rename option for adding the extension .old at the end of these file names.

        • Then the file names like CompanyName.qbw.tlg will be named as CompanyName.qbw.tlg.old and the Network file MyCompanyFile.nd must be renamed as MyCompanyFile.nd.old.

        • Once done with that hit Enter key the name will be changed of the files.

      Solution 4: Copy-Paste Company Files to Desktop

        • The first step involved in this procedure is to create an empty folder on the desktop, name it QBTest.

        • Now go to the QuickBooks folder where your company files are stored

        • To copy the files select them and press the Ctrl+C.

        • To open  the Company Open Window, press and hold The Ctrl key it will appear on your screen.

        • Now tap a click on Restore or Open an Existing Company and select for opening company file & then click NEXT.

        • Finally, you must select the new folder ‘QBTest’ to open the copied company files.

      Solution 5: Removing the issue through QuickBooks Backup File Update

        • If solution 4 is not working then you need to fix your QuickBooks company files.

        • Firstly, close QuickBooks.

        • You need to hold the Ctrl key long, till the No Company Open Window is displayed on your window

        • The next step is to press Restore or Open an Existing Company

        • After the above steps, you have to click on the option of Restore a Backup copy.

        • Hit on Next and follow the instructions given on the upcoming windows for restoring backups for QuickBooks.

      Solution 6: Download QuickBooks Database Server Manager

        • Now launch your QuickBooks Tool Hub interface and on the left panel select the option head for Network Issues.

        • Under head of Network Issues on the side panel hit tap on QuickBooks Database Server Manager.

      Network-Issues-tab-QuickBooks-Database-server-manager

        • Process it so that you can easily fix database server failure issues.

        • Scan your company files to check error is fixed or not

        • First, head toward the Scan and Folder tab

        • By selecting company files of extension .qbw with the browse option you can go through the files on your system. The selected .qbw file will go through scanning for errors.

      Solution 7: End QuickBooks tasks from Task Manager

        • When you have logged in as Admin on your system, either go to the start menu or press the keys together Ctrl+ shift + Esc to open Task Manager

        • It will display all background programs running on your system, with your cursor highlighting the first part and the QuickBooks Process will appear.

        • There you will get to see adjoining QuickBooks methods such as qbupdate.exe, QBW32.exe, and QBDBMgr.exe, now end the task for them.

        • Now see if your company files are opening successfully, this indicates error 6129 101 is fixed.

      Solution 8: Verify folder permissions manually

        • Hit a right-click on the company file folder to go to its properties.

        • You need to go to the Security heading in the properties window and hit on Advanced button.

        • Where you see permission entries, select the QBDataServiceXX > Edit option.

        • Now hit a click on Show Advanced permission, where you have to see if these permissions are tick-marked

        • List Folder/Read Data

        • Read Extended Attributes

        • Create Folders/Append Data

        • Write Extended Attributes

        • Traverse Folder/Execute File

        • Read Attributes

        • Create Files/Write Data

        • Write Attributes

        • Read Permissions

        • If the permissions are not rightly set, then follow the steps

        • Right-click on the company file folder and from the drop-down menu select the option of properties.

        • A properties window is displayed where you need to head towards the Security tab.

        • On QBDataServiceUserXX make sure you give full control to the user. Tap on Apply, then Ok for completion.

      Conclusion

      This guide provides a comprehensive overview of how to fix QuickBooks Error 6129 101, a common issue related to database connectivity failures. By following the step-by-step solutions outlined in this blog, QuickBooks users can effectively resolve this error and restore access to their company files.

      If you continue to experience issues or need further assistance, feel free to contact our QuickBooks Error Support team at our toll-free helpline: +1-844-926-4607.

      Related article:

      How To Resolve QuickBooks Error Code H101?

      How To Rectify QuickBooks Payroll Error PS032 Or PS077?

      How to Fix QuickBooks Error 1310 (Error Writing to File)

      How to Fix QuickBooks Error Code 1310?

      QuickBooks is a powerful accounting package of software that is suitable for all types of business financial management systems and can keep transactional records, invoices, payments, employees, and client information with data integration. But sometimes while you want to update the software or complete the installation process, you might be restricted or stopped by some error messages. A dialog box with the title QuickBooks Installation Information with an error code is shown on your screen “ QuickBooks Error code 1310″: Error writing to file: C:\Config.Msi\5f60cd6.rbf. You are needed to check that you have access to the directory.”  The warning message indicates QuickBooks Error code 1310.

      QuickBooks-error-1310

      Let’s go through the blog post for the required actions to be performed for troubleshooting QuickBooks Error 1310, but first, we need to identify symptoms that will help to identify the error and the root cause behind it so that we could do resolution.

      But before that remember some key points:

        • Check if you have granted all permits for UAC in your Windows account.

        • To avoid interruption from third-party software while you are performing installation, in safe mode restart your Windows desktop.

        • Use another location for the installation process of software.

        • Check for free space on your hard drive before QuickBooks installs.

      QuickBooks Error code 1310 Symptoms

      Following are the symptoms for QuickBooks Error code 1310, let us go through them:-

        • QuickBooks window closes on occurrence of error.

        • The QuickBooks Installation process is halted for the latest updates.

        • The computer shuts down frequently in some cases.

        • There is frequent hanging and freezing of QuickBooks when you are accessing QuickBooks features.

      Causes of QuickBooks Error code 1310

      The varied causes for the QuickBooks Error code 1310, which is an installation-related error are listed below. By analyzing the root cause, we can ether to resolution steps with an ease. These are:

        • Lack of space required on the Hard drive for installation.

        • Necessary permissions required for installation or upgradation process to implement.

        • The system’s Date and Time are not set properly on the system.

        • The QuickBooks installation folder can’t be touched without a grant from Admin.

        • No license of Microsoft Windows Installer, as the firewall settings are made to prevent unauthorized access and thus, prevent updating.

        • Unstable connectivity of network.

        • Installation sourced is hampered.

        • Hard drive is crashed, or files are corrupted.

        • Installation drive while updating setup of QuickBooks is set to Read-Only mode.

        • The installation process is halted by an antivirus program that is treating updates as inferior or risky.

      Troubleshooting Methods to fix QuickBooks Error  code 1310

      Here are some steps by following them you will be able to fix this issue successfully. These methods are provided as follows:

      Method 1: Modification of UAC

      Turning-off-User-Account-Control-UAC-Screenshot-1024x542.png

        • With your admin Window account, check if you are logged in successfully.

        • You are then required to restart your PC system on which the error 1310 has occurred

        • And then try to update or reinstall it to check if the error is coming or not.

        • After that enable UAC permissions and tap on menu Never Notify.

        • Continue the updation of QuickBooks.

      Method 2: Procedure for Re-register MS Windows Installer

      Here are some points that should be kept in mind:

        • Due to Windows Installer pre-settings you sometimes need to unregister it and then again register to take precautions for the problems faced while updating QuickBooks and causing QuickBooks Error code 1310. For the following process to execute you are required to the run dialog box from the Start menu.  

        • Write through your keyboard on the search field “msiecec/unreg” for unregistering.

        • To again proceed with the procedure of re-registration, you need to retype in the run dialog box the given text: msiexec/regserver and tap on the Enter key.

        • At the end when you are done with these procedures, now again relaunch your QuickBooks software with your admin credentials and go for updating again.

        • If the QuickBooks Error code 1310 still prevails, manually update it from the Inuit official site of QuickBooks products by downloading the .exe file and reinstalling it by altering the UAC settings again for effectiveness.

      Method 3: Taking the help of QuickBooks Error code 1310 Install the Diagnostic Tool

        • To resolve the QuickBooks Error code 1310, Quick Install Diagnostic tool for the optimal result. This tool is available in QuickBooks Tool Hub features.

        • Now head towards the tab on the left panel of QuickBooks Tool Hub, namely, Installation Problems. On the side wide of the left panel you are required to click on the option of Run QuickBooks Install Diagnostic Tool to fix the error.

      QuickBooks-Install-Diagnostic-tool

        • After the procedure of downloading and installing this tool, apply the troubleshooting process with the help of this tool you need to check if your QuickBooks is running in the background, otherwise you need to close it.

        • After the process is fully executed it will restart the PC on its own and again begin installation for Quickbooks.

      Method 4: Manually providing admin installation access via Command Prompt

        • For the initial step to take place in fixing QuickBooks Error code 1310, from the start menu move towards the head of Accessories  > All Programs under this head.

        • On finding Command Prompt from All Programs, hit the click on Run as Administrator options available by right-clicking on it.

        • In this you are required to type the following text for accessing the full admin grant for installation, i.e., icacls “C:\Config.Msi” /T /C /grant administrators: F”. Now on typing this press enter.

        • Finally, just to see that QuickBooks Error code 1310 is solved, try to install the program again.

      Conclusion

      Finally, we conclude that QuickBooks Error code 1310 which is an update and installation problem, can be resolved by identifying through giving symptoms, knowing the root cause of the QuickBooks Error code 1310 occurrence, and following the instructions carefully. But if still you are confused with procedures, Our QuickBooks support team is available 24×7 at your service via live chat or contact at +1-844-926-4607.

      How to Rectify QuickBooks Error C= 51

      How to Fix QuickBooks error code C=51?

      When you try to delete a transactional record from the QuickBooks database, you may encounter an error window displaying QuickBooks error code C=51. QuickBooks error code C=51 points out the TxList is missing, which is a transactional file where records are been fetched of bills, payments, income, expenditure, etc. The QuickBooks error code C=51 also appears when you are accessing .qwb company files.

      The article guides you on how to fix QuickBooks error code C=51, why it is caused, and what procedures need to be followed. The user needs to proceed step by step to eliminate errors.

      Causes for QuickBooks error code C=51

      Let us learn the cause behind QuickBooks Error C=51:

        • When your QuickBooks encounters verification problems, in terms of implementation and user accessibility, then rebuild QuickBooks error code C=51.

        • If the company files are hampered or corrupted.

        • Then you want to be able to access store transactions, then your database is damaged or corrupted.

        • When your QuickBooks is expired.

      Requirements before Fixing QuickBooks error  code C=51

      Before you go ahead with fixing QuickBooks error code C=51, see if your QuickBooks has the following requirements to proceed further:

        • The user should make sure that the corrupted (.qbw) company file and (.tlg) transaction log file are in the same folder.

        • See if all files with extension .qbw are corrupted or not.

      Instant Steps for Resolving QuickBooks Error code C=51

      Always create a backup of files so that while performing the steps you won’t lose data or get damaged. The quick fix process to remove QuickBooks error code C=51 is:

        • Stop and close QuickBooks, when error strikes.

        • Switch off the windows which were running with your QuickBooks software.

        • Try to reboot your QuickBooks.

        • Continue repeating the procedures, until QuickBooks error code C=51 gets resolved.

      Rectifying Solutions for QuickBooks error code C=51

      The following solution for QuickBooks error code C=51:

      Step 1: Update QuickBooks Software

        • In QuickBooks software, go to the Help menu then select the option for “Update QuickBooks Desktop”.

      Updating-QuickBooks-Image

        • Now the very next step is to hit on the tab Update Now, checklist the Reset Update option.

        • In the end, tap on the button of Get Updates to begin the process.

      Step 2: Stop and Close QuickBooks Windows processes

      Follow the instructions below:

        • Close all the ongoing QuickBooks programs by hitting the close button on top right.

        • Alternatively, open Task Manager from the start menu then close all QuickBooks files.

        • Try to perform a similar task when QuickBooks error code C=51 occurs.

        • At last, you need to rebuild QuickBooks data in a standardized format.

      Step 3: Checking your Data and validating in QuickBooks

      Method to check data if verified-

      By using the Verify Data method we can fix QuickBooks error code C=51. Also, we need to fix data integration problems through Rebuild data from Utility. The steps to use the verify data tool are as follows:

        • The very first step is to go to File Menu > then hit a click on Utilities > now select Verify Data from drop-down options.

      Naviagate-Utilities-Option-Screenshot.jpg

        • If the message pops up on the screen:‘QuickBooks detected no problems with your data’.

        • But if the message displays as: ‘Your Data lost Integrity’, you got some corrupted or damaged files. Users have to again do the data rebuilding process.

      Method to Rebuild Your Data-

        • The first step to rebuilding data is to go to Files > then from drop-down select Utilities.

        • A pop-up window appears, asking for the creation of the backup file. Now you need to hit OK.

        • Files will be saved in a specific place on your system.

        • When finished, the Rebuild Completed dialog box appears on the screen, again Verify data.

      Step 4: Utilize the QuickBooks File Doctor Tool

        • Under the Company head in QuickBooks Tool Hub you will find the QuickBooks File Doctor section.

        • Now the next step is from the File Issues menu you need to have File Doctor utility by installing it on a PC.

        • Check files if there is an issue.

        • Fix the issue by using the Tool.

      Step 5: Restoring Backup File

      Follow the points to restore backup file:

      Open-or-Restore-a-company-file-Image.png

        • Press the keys together Ctrl+C. this will transmit the file to a new folder on your PC.

        • Check file won’t exceed 6 MB minimum size.

        • Select properties by right-clicking on the file for restoring.

        • Execution will not begin if the file is less than 6MB.

      Step 6: Make sure the Internet is stable

      Loss in internet connection or poor strength of internet Mbps, will not let you perform or make a connection to the server for retrieving transactions for operations like deletion, creation, and validation.

      Step 7: Retrieving lost or deleted transactions

        • The first step required in this process of retrieving is opening the Audit Trail Summary, which represents all sorts of transactions including removed ones.

        • Again you have to type the deleted data for restoration.

        • If any modifications are made to the transaction, then it will be shown.

        • The next step for opening a report, go to the Report menu of QuickBooks.

        • From the Account and Taxes section, you have to click on the Audit Trail option.

        • All the transactions that were halted due to technical problems will be shown.

      Conclusion

      The complete guide for troubleshooting QuickBooks error code C=51 is an error based on problems while you are deleting or unable to access the TxList of QuickBooks. We can across causes, how to quickly fix QuickBooks error code C=51, and detailed procedures for resolution.

      But still, the Error is still not fixed, reach us at QuickBooks Error Support representative or call us at +1-844-926-4607.

      Recommended to read:

      Fixing QuickBooks Error Code 179

      How to Resolve QuickBooks Error 400?

      How to Repair QuickBooks Error 4120

      How to Repair QuickBooks Error 4120?

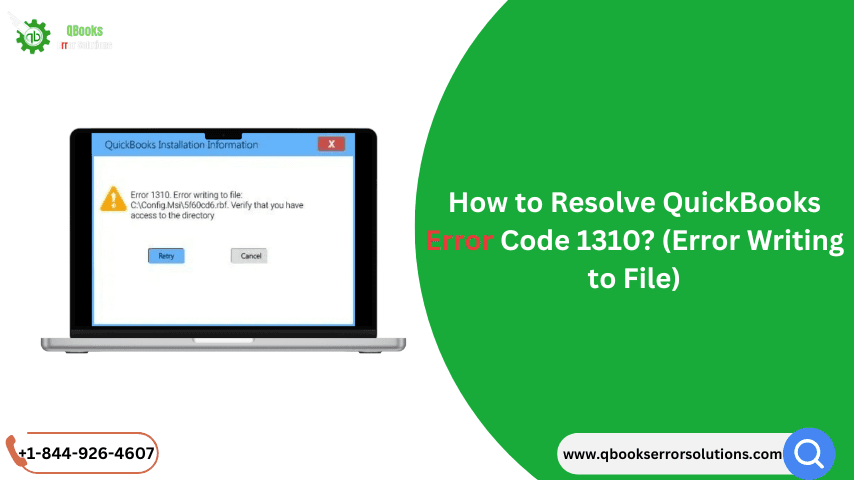
      Procedure to Resolve QuickBooks Error 4120

      QuickBooks, being a reliable and advanced accounting software can handle any kind of business data. This efficient software manages to perform complex accounting calculations on large databases and keeps track of transactions. Sometimes, when you are trying to open QuickBooks while runtime you may come across an Error message which displays as follows:

      Error : 4120 QuickBooks has encountered a problem and needs to be shut down.’

      QuickBooks Error 4120

      This is QuickBooks Error 4120, which is a run time error issue when you are accessing QuickBooks software on your computer. This error generally appears on your screen when you are trying to open a QuickBooks company file, but while opening either warning box is popping up or your software is not responding. Thus, the error creates hinderance in your workflow.

      Let us go through the article which will provide you detailed procedure on resolving QuickBooks Error 4120.

      Symptoms of QuickBooks Error 4120

      There are few symptoms the system faces because of the Error 4120. These help us to identify if these signs are there then the following Runtime Error exists, that are:-

      • Freezing or crashing of system.
      • Warning message appears on your QuickBooks window.
      • Frequently, the program closes.
      • QuickBooks is not responding to the user and company files are not opening.

      Causes for QuickBooks Error 4120

      Before going towards the resolution steps for solving QuickBooks Error 4120, we should first get to know causes behind it:

      Here are some causes of this Error:

      • Your computer system is corrupted, or some adjoining Microsoft Component is missing or damaged which has enabled the error and has led to the non-stability or malfunctioning of QuickBooks Desktop program.
      • When QuickBooks Error code 1935, i.e., an error occurred when the .NET framework in your PC is missing or not installed which leads to problems in your QuickBooks Installer.
      • When your PC system in which you are using your QuickBooks is facing problem related to C++ or MSXML (XML component file for Microsoft office suite), that is corrupted.
      • When QuickBooks error code 1603, an error which signifies .NET framework is installed incompletely which has led QuickBooks to face issue for Error 4120.
      • Other QuickBooks Desktop warning messages, which has created this Error 4120.

      Other causes that led to error:

      • Error 4120 is caused by faulty QuickBooks registry, which is by mistaken modified by a software in QuickBooks desktop.
      • When you files are not completely installed or corrupted.
      • When an application like cleanup softwares has accidentally removed QuickBooks files.
      • Virus intrusion has hampered Windows files and has indirectly affected QuickBooks.
      • If your PC system where you are using QuickBooks by default has flagged executable files (.exe) as harmful.

      Resolution Methods for QuickBooks Error 4120

      Following are the resolution steps for solving Error 4120, which is a runtime error caused by system problems. Here’s a quick guide:

      Method 1: Reinstalling/ Repairing QuickBooks software

      • The first measure to reinstall or repair your QuickBooks system successfully, you need to first open the Control Panel > then head towards uninstall option. Two options for either uninstall or repair appear on the window.
      • From there select QuickBooks program and then head to uninstall process. Now again download latest version from intuit website and reinstall QuickBooks.
      • If your QuickBooks again generates Error 4120, now begin the process of repair when you hit on uninstall option from Control Panel.

      Method 2: Migrating Company Files to other system

      Follow the below instructions:

      • The first step in this process of transferring company files to other system is copy them on the system you wish to shift.
      • Now check If your copied files are opening in that system you have shifted, if it does, it means you must repair your earlier Windows system.
      • If they are not opening on another system also then these files are corrupted or damaged which can be fixed by file doctor tool, which you required to install.

      Method 3: Analysing Possible System Errors

      • To verify if your PC system is not affected by any system errors you need to first check through an antivirus software or malware detecting software (which is recent and updated).
      • With this software, scan your system for error checking.
      • Perform necessary steps for removal of viruses and malwares.

      Method 4: Utilizing QuickBooks File Doctor

      Follow the given points below:

      • For utilization of QuickBooks File Doctor Tool for repairing broken company files, you are needed to download QuickBooks Tool Hub.
      QuickBooks-file-doctor-from-tool-hub-Screenshot-Image.png
      • When downloaded and installed the Tool hub, go to left panel for option of Company file issues. There a side window opens for Fix My Company File, where you will find QuickBooks File Doctor Tool.
      • Use the tool for file fixation.

      Method 5: Run Disk Cleanup

      • Disk Cleanup process helps to resort the problem of space which is occupied by extra files and helps to reduce runtime error such as QuickBooks Error 4120. First important thing in this procedure is to create backup for your needed files of your system. By doing so you are making way for hard drive space.
      • The very next step required is restarting the PC & clear the cache of your PC system.
      • After this you just right click on mouse of you C:Drive(main directory) & by opening Window Explorer by pressing Win + E, run the option of disk cleanup by hit a click on properties > disk cleanup option.

      Method 6: Fixation and Reinstallation of MS .NET framework

      For Windows 7,Vistas and XP

      • Close all your system apps and hit a click on Start menu > Control Panel windows.
      • There you will find the Add or Remove option, where you are needed to select the option for Microsoft .NET Framework 4.
      • Now additionally you have to tap on Change/Uninstall, where setup wizard pops up.
      • Then you are required to follow the instructions carefully for repairing. Now also you need to implement the Repair .NET framework Installation Wizard window panel and the restart your PC system.
      • Check if the runtime QuickBooks Error 4120 is totally resolved and no more warnings are there.

      For Windows 8 and 10

      • In the following windows 8 and 10, you will find the Microsoft .NET Framework 4 in the tab head Programs and Features.
      • Windows 8 is preinstalled with Microsoft .NET Framework 4 feature on the PC system.
      • For this purpose, use a repair tool for .NET fixation process.

      Method 7: Installation of Newest Windows Updates

      • Sometimes due to the old version or outdated edition of Windows you may face runtime error of QuickBooks Error 4120. The new Windows upgrade will help to curb out the issues related to .NET framework, MSXML and C++.
      • In this context, the very prior step is to hit a tap on Windows start button on keyboard to open start menu.
      • You can look for Windows Update window by typing it into the search field of start.
      • Update the requirements of Windows, after successfully update process, restart your PC, to check error gets sorted.

      Conclusion

      The Resolution Guide on QuickBooks Error 4120, specifies the runtime issues which disables us to access QuickBooks software and company files which leads to delay in operations. The guides give a comprehensive look on symptoms and causes which leads to Error 4120 generation. With resolution guide user can solve the error successfully.

      You can take assistance from our QuickBooks error support experts who will resolve the error efficiently with our 24×7 hour live chat support at qbookserrorsolutions and helpline number +1-844-926-4607.

      Related articles:

      Troubleshooting QuickBooks Banking Error 179

      How To Troubleshoot QuickBooks Payroll Error 9000?

      How to Resolve QuickBooks POS Error 176109

      How to Resolve QuickBooks POS Error 176109?

      POS (Point of Sale) in QuickBooks is a desktop software integrated feature that allows you to carry out business operations with ease.  It is a locally installed system that can handle all types of business needs, whether small or big. The POS provides services like payments, managing inventory, automated processes, real time orders and decisions, seamless shopping experience, etc. But when using this integrated feature, you are facing warnings of:

      ‘Error: QuickBooks POS Error 176109’ with ‘Error Message: QuickBooks Error code 176109: Invalid Product Code or Invalid Product Number

      QuickBooks-POS-error-176109

      The warning is displayed when there is an issue in accessing and registering the Point of Sale Application of QuickBooks. This indicates that there is a problem in the authentication file of the product, or there may be limited access given by the administrator. The Product code of POS may be outdated, POS files are corrupted, or need to be renewed. The user needs to read the article of brief guide for POS Error 176109 and methods to resolve it.

      Causes of QuickBooks POS Error 176109

      QuickBooks POS Error 176109 is error related to Point of Sale integrated application of QuickBooks which is responsible for sales, purchases and payments services and helps in tracking along with QuickBooks. Issue may be in POS wrong registry or invalid product number.  From this let us learn few causes responsible for the error:

      • The permissions required to access the POS application are restricted by the admin itself. You are required to provide access rights from authentic person(admin).
      • Second cause may be the wrong product key required for using POS services, you are using received while installing POS. This is Invalid Product Code or Invalid product Number.
      • Third cause is when your QuickBooks POS entitlement folder has files that are corrupted or damaged. You can recognize this by performing anti-malware scanning for specific files.
      • Lastly, it may be caused if you have entered wrong information like Product key, user information, transaction details, employees or Customer information, etc.

      Key Points while Resolving QuickBooks POS Error 176109

      Here are some key pointers you must follow before applying resolution steps for QuickBooks POS Error 176109:

      • For prevention from data loss of your QuickBooks Database and protecting business information, it is always recommended to keep latest company files backup before you are troubleshooting.
      • It is an important method of updating your QuickBooks as well as POS system to latest released versions so that there is no hinderance while your performing troubleshooting steps for fixing POS Error 176109.
      • You must unhide the entitlement folder of POS; this is because by default this folder is hidden. To unhide it, move towards the Windows Settings and modify it to show hidden files. You will able to see POS files in entitlement folder, though it was required if in case this folder needs deletion operation.

      Fixing QuickBooks POS Error 176109

      Ways for resolving QuickBooks POS Error 176109 are given below, follow carefully for optimum result:

      Method 1: Deletion of Contents from the POS Entitlement folder

      If the POS product key Error 176109 encounters, then it is required to follow steps for deletion of contents.

      For Windows 8 Steps are as follows

      • The initial step to delete contents for windows is to hit a click on Start button then head towards File Explorer.
      • Now the next required step is to click on View menu on the Menu ribbon and tick mark the hidden items.
      • Direct towards “C:\Program Data\Intuit\Entitlement Client\v8” from the left pane and the next step is to hit on delete for selected files.
      • Now when the above steps are done, reopen the Point of Sale application, perform registration, and other requirements asked for.

      For Windows 7 and Vista Steps are as follows

      • When you have opened  File Explorer, you need to go to Organize tab then select the Folder.
      • After this the next procedure is to go to View > tap a click on the Show hidden files option.
      • Now from the left pane move to the path: C:\Program Data\Intuit\Entitlement Client\v8.
      •  Now again select the files for deletion operation, and hit a click on Delete.
      • Now again open the POS integrated with QuickBooks for registry.

      Method 2: Reinstalling QuickBooks Point of Sale

      • Uninstall QuickBooks POS from the Control Panel.
      • From the official site of Intuit download and Install a recently released version of Point of Sale.
      • Now very next step is to see if any issue occurs, otherwise you need to repair the reinstalled POS.
      • Check if you entered the Product & License numbers are right.
      • Relaunch Point of Sale to see if the error is removed.

      Method 3: Remove Entitlement Client Folder &Files

      Delete-the-EntitlementDataStore.ecml-file

      Follow the given points

      • QuickBooks POS entitlement folder has the files that ensure your credentials, product information, and license are accessible and accurate. In the case of POS Error 176109, you need to re-enter the product key and license number.
      • Find the location of C drive program files and folders then you must give path as C:\Program Data\Intuit\Entitlement Client\v8.
      • As soon as the Entitlement folder opens up immediately press key together Ctrl +A for selection of all the files.
      • After your selection is highlighted hit a tap on Delete button on keyboard, click on Yes when prompt appears.
      • Finally relaunch your QuickBooks POS to check that error 176109 is resolved.

      Method 4: Rename WS(Web Socket) Activity file

      • WS file is an XML file for network operations, protocols, datatypes, etc. For renaming this file first step is to open the Window Explorer by tapping on the Win+E keys together.
      • Direct your path address towards: C:\Program Data\Intuit\QuickBooks Point of Sale XX\ Ini.
      • From the location you need to look out for WSActivity folder and from the dropdown menu list by right clicking on the folder, select rename option.  
      • Prefix OLD at the beginning of the WSActivity folder, the name will look like this: OLDWSActivity and Enter.
      • Now the final step is to exit from this and try to relaunch QuickBooks POS to see if POS Error 176109 is removed.

      Method 5: Implement Clean Install of QuickBooks POS

      Clean Installing tool provided by QuickBooks in Point of Sale for eliminating problems faced during installation process. Here are some essential steps for Clean Install:

      • Initially you need to hit on the start button on Windows bar at the bottom and type the Control Panel to open the window of the following.
      • The very next step is to head towards Programs and Features > need to go to programs list, then click on QuickBooks Desktop Pont of Sale 18.0 > at last, select the Uninstall or Change from the following options.  
      • Lastly you need to follow the prompts coming while you are doing the process for same.
      • However, now you need to copy and paste the Point-of-Sale data folder on your PC desktop and you are required to put a suffix.OLD is an extension for folder names.
      • The renaming will divert QuickBooks to identify this folder and it will automatically create a new POS data folder.

      For the deletion process of QBPOSDBSrvUSER, implement the steps:

      • Open Control Panel then move towards the head User Accounts > From there you need to select Manage another account.
      • Hit a click on Continue under the window of User Account.
      • Very next step is you are required to choose QBPOSDBSrvUSER > now tap on Delete the account option for removing this file.
      • After you have successfully deleted the following file, now Reboot process you PC and reinstall QuickBooks POS application.

      Final Note!

      Alas! We have successfully come across the brief guide for Resolving QuickBooks POS Error 176109, which is actually an error related to an invalid product key which is required to access the Point of Sale application, an integration with QuickBooks. Following this guide will help you resolve the error efficiently. For more information you can talk with QuickBooks Error support on helpline number +1844-926-4607.

      Recommended to read:

      Methods to Fix QuickBooks Banking Error 179

      Methodologies To Fix Missing Employee In QuickBooks Desktop Payroll